Asphalt Shingle Roofing Company Your Guide
Asphalt shingle roofing company – Asphalt shingle roofing companies play a crucial role in protecting homes and businesses. Understanding asphalt shingles, from their composition and lifespan to installation and maintenance, is key to making informed decisions. This guide explores everything you need to know about asphalt shingle roofing, from choosing the right shingles to selecting a reputable contractor. We’ll cover material types, installation processes, maintenance tips, cost factors, and even help you find the perfect company for your roofing needs.
We’ll delve into the specifics of different shingle types, highlighting their strengths and weaknesses. You’ll learn about the intricacies of proper installation, including the vital role of underlayment and flashing. We’ll also address common maintenance issues and provide practical solutions. Finally, we’ll guide you through the process of selecting a qualified and reliable asphalt shingle roofing company, ensuring a smooth and successful project.
Asphalt Shingle Roofing Materials

Source: roofgiants.com
Choosing the right asphalt shingles for your roof is a crucial decision impacting both the aesthetic appeal and the longevity of your home. Understanding the different types available, their composition, and their lifespan will help you make an informed choice. This section will provide a detailed overview of asphalt shingle roofing materials.
Asphalt Shingle Types and Properties
Different types of asphalt shingles cater to various budgets and aesthetic preferences. The table below summarizes key features of common shingle types.
| Shingle Type | Material Composition | Lifespan (Years) | Cost Range |
|---|---|---|---|
| 3-Tab | Asphalt, fiberglass mat, mineral granules | 15-20 | $30-$60 per square (100 sq ft) |
| Architectural (Dimensional) | Asphalt, fiberglass mat, mineral granules, layered design | 25-30 | $60-$120 per square (100 sq ft) |
| Designer | Asphalt, fiberglass mat, mineral granules, complex layered design, premium materials | 30+ | $120+ per square (100 sq ft) |
Asphalt Shingle Manufacturing
The manufacturing process of asphalt shingles involves several key steps to create a durable and weather-resistant product.
The manufacturing process is a carefully controlled procedure to ensure consistent quality. Each step plays a vital role in the final product’s performance.
- Fiberglass Mat Production: Continuous strands of fiberglass are woven into a mat, providing the structural base for the shingle.
- Asphalt Saturation: The fiberglass mat is saturated with asphalt, a petroleum-based binder that provides waterproofing and flexibility.
- Mineral Granule Application: A layer of colored mineral granules (typically basalt or slate) is applied to the asphalt surface for UV protection and aesthetic appeal.
- Cutting and Shaping: The saturated and granulated mat is then cut and shaped into individual shingles, according to the desired design (3-tab, architectural, etc.).
- Cooling and Packaging: The shingles are cooled to solidify the asphalt and then packaged for distribution.
Asphalt Shingle Durability and Longevity Comparison
The durability and longevity of asphalt shingles vary depending on their type and quality. The following table highlights key differences.
| Feature | Comparison |
|---|---|
| Wind Resistance | Architectural and designer shingles generally offer superior wind resistance due to their layered design, compared to 3-tab shingles. Higher wind ratings are available within each shingle type. |
| UV Resistance | All asphalt shingles have UV resistance due to their mineral granules; however, higher-quality shingles with thicker granule coatings offer better long-term protection. |
| Lifespan | Designer shingles typically have the longest lifespan (30+ years), followed by architectural shingles (25-30 years), and then 3-tab shingles (15-20 years). Actual lifespan can vary depending on climate and installation quality. |
| Cost | 3-tab shingles are the most economical, while designer shingles are the most expensive. Architectural shingles fall in between. |
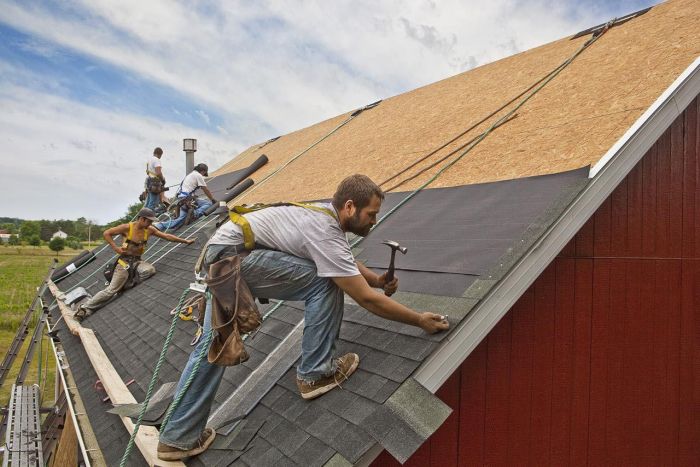
Roofing Installation Process: Asphalt Shingle Roofing Company
Getting a new asphalt shingle roof is a significant investment, and understanding the installation process ensures you get the best possible result. A properly installed roof protects your home for years to come, preventing costly water damage and ensuring its structural integrity. This section details the typical steps involved in a professional asphalt shingle roof installation.
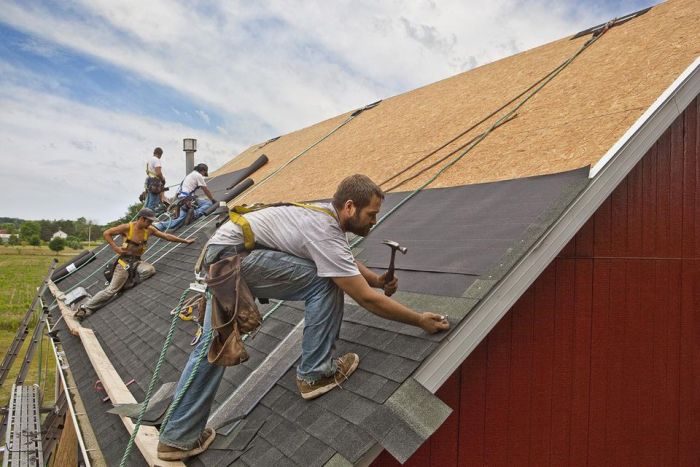
- Preparation and Measurement: The first step involves a thorough inspection of the existing roof (if applicable), removal of old materials, and precise measurements of the roof’s surface area to determine the necessary materials. This ensures accurate material ordering and minimizes waste.
- Sheathing Inspection and Repair: The roof deck (sheathing) is inspected for damage. Any rotted or damaged sections are repaired or replaced before new roofing is installed. This is crucial for a stable and long-lasting roof.
- Underlayment Installation: A waterproof underlayment is installed over the sheathing, acting as a secondary barrier against water penetration. Different types of underlayment offer varying degrees of protection, and the choice depends on factors such as climate and budget.
- Flashing Installation: Flashing, typically made of metal, is installed around chimneys, vents, and other roof penetrations. This prevents water from entering these vulnerable areas. Proper flashing is crucial for preventing leaks.
- Starter Course Installation: A starter course of shingles is installed along the eaves (the lower edge of the roof) to provide a straight, even base for the rest of the shingles. This ensures a neat and uniform appearance.
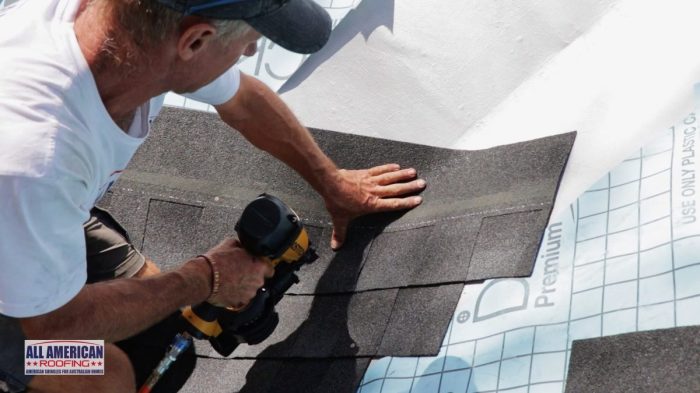
- Shingle Installation: Asphalt shingles are installed in overlapping rows, working from the bottom to the top of the roof. Each shingle is carefully aligned and nailed securely to the sheathing.
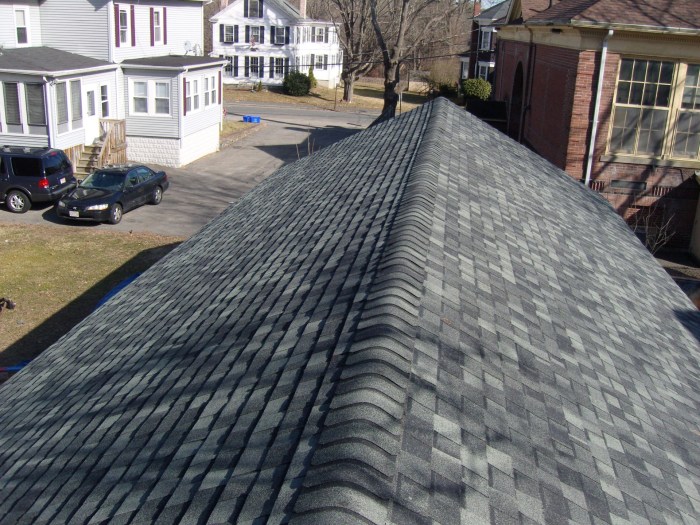
- Ridge Cap Installation: Ridge cap shingles are installed along the ridge (the highest point of the roof) to protect the roof’s peak from weather damage. These shingles are specifically designed to withstand the harshest elements.
- Cleanup: After installation, all debris and leftover materials are removed from the property, leaving the area clean and tidy.
Underlayment and Flashing: Preventing Leaks
Proper underlayment and flashing are critical for preventing leaks. Underlayment provides a secondary water barrier, protecting the roof deck in case the shingles are damaged or fail. Flashing seals penetrations in the roof, preventing water from entering the house through chimneys, vents, or skylights.
Imagine this: A cross-section of a roof shows the sheathing underneath the shingles. A layer of black underlayment covers the entire sheathing, acting like a waterproof blanket. Around a chimney, you see a metallic flashing carefully tucked under the shingles and extending up the sides of the chimney, creating a sealed barrier to prevent water from running down the chimney and behind the shingles. This illustrates the combined protective layers preventing water ingress.
Common Installation Challenges and Solutions, Asphalt shingle roofing company
Even experienced roofers encounter challenges. Understanding these common issues and their solutions is key to a successful installation.
- Problem: Uneven sheathing. This can lead to uneven shingle installation and potential problems. Solution: Repair or replace damaged sheathing before installing the underlayment and shingles.
- Problem: Incorrect flashing installation. This is a major source of leaks. Solution: Ensure proper overlap and sealing of flashing around all penetrations. Consult manufacturer instructions for specific flashing types.
- Problem: Improper shingle alignment and nailing. This can lead to gaps and water infiltration. Solution: Follow manufacturer’s instructions carefully, ensuring proper shingle overlap and using the correct number of nails per shingle.
- Problem: Difficult weather conditions (e.g., extreme heat or cold, strong winds, rain). Solution: Schedule the installation for optimal weather conditions whenever possible. Take necessary safety precautions and utilize appropriate techniques to work safely and efficiently in challenging weather.
- Problem: Improper ventilation. This can lead to moisture buildup and premature shingle failure. Solution: Ensure adequate ventilation in the attic space to allow for proper air circulation and prevent moisture accumulation.
Asphalt Shingle Roofing Maintenance and Repair
Keeping your asphalt shingle roof in top condition is crucial for protecting your home and extending its lifespan. Regular maintenance and prompt repairs can prevent costly damage down the line. This section details a maintenance schedule, common problems, and how to fix them.
Asphalt Shingle Roof Maintenance Schedule
A proactive approach to roof maintenance is key. This table is a recommended schedule for inspections and cleaning to help you keep your roof in great shape.
| Inspection Frequency | Task | Tools Needed | Notes |
|---|---|---|---|
| Twice a year (Spring & Fall) | Visual inspection for missing, damaged, or curling shingles; check for debris buildup in gutters and valleys; inspect flashing around chimneys and vents. | Binoculars, ladder (if necessary), leaf blower or broom | Pay close attention to areas prone to damage like corners, valleys, and ridges. |
| Annually | Thorough cleaning of roof using a soft brush and leaf blower to remove leaves, twigs, and other debris. | Ladder, soft-bristled brush, leaf blower, garden hose (optional for rinsing) | Avoid using high-pressure water, which can damage shingles. |
| As needed | Repair of damaged shingles, flashing, or other roof components. | Replacement shingles, roofing cement, hammer, utility knife, ladder, safety harness (if working at height) | Consult a professional for extensive repairs or if you’re uncomfortable working at heights. |
Common Asphalt Shingle Roofing Problems and Their Causes
Several issues can affect asphalt shingle roofs. Understanding the causes can help with prevention and repair.
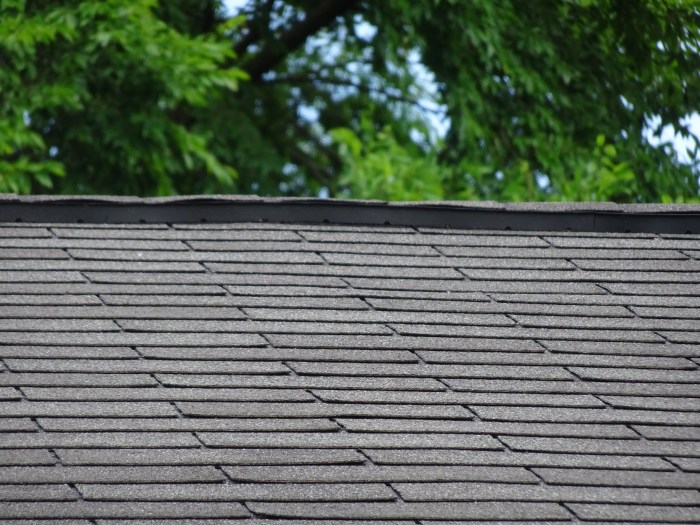
- Curling Shingles: This occurs when the edges of shingles lift, often due to sun exposure, poor ventilation in the attic, or moisture buildup. This can lead to water damage.
- Cracking Shingles: Cracks can result from age, impact damage (like hail or falling branches), or extreme temperature fluctuations. Cracked shingles are vulnerable to water infiltration.
- Missing Shingles: Strong winds, storms, or even simple wear and tear can dislodge shingles. Missing shingles leave your roof exposed to the elements.
- Granule Loss: Over time, the protective granules on asphalt shingles can wear away, exposing the underlying asphalt. This reduces the shingle’s lifespan and waterproofing capabilities.
- Algae and Moss Growth: In humid climates, algae and moss can grow on shingles, causing discoloration and potentially trapping moisture. This can lead to shingle degradation.
Repairing Common Asphalt Shingle Problems
Addressing minor shingle damage promptly prevents larger, more expensive repairs. Here’s a step-by-step guide for common fixes.
- Assessment: Carefully inspect the damaged area to determine the extent of the problem and the necessary materials.
- Material Selection: Choose replacement shingles that match the existing ones as closely as possible in color and style. For minor repairs, roofing cement can be used as an adhesive.
- Preparation: Clear the area around the damage. If replacing a shingle, carefully remove the damaged shingle and any surrounding loose or damaged ones.
- Repair/Replacement: For minor cracks, apply roofing cement to seal the crack. For missing shingles, carefully nail the new shingle in place, ensuring proper alignment with the surrounding shingles. Use roofing nails designed for asphalt shingles.
- Cleanup: Remove debris and dispose of it properly. Inspect the repaired area to ensure a watertight seal.
Asphalt Shingle Roofing Costs and Budgeting
Source: tqn.com
Getting a new roof is a significant investment, and understanding the costs involved is crucial for planning and budgeting. Asphalt shingle roofing, while generally affordable, has a price range influenced by several key factors. This section breaks down the cost components and offers a sample budget to help you navigate this process.
Factors Influencing Asphalt Shingle Roofing Costs
Several factors significantly impact the overall cost of an asphalt shingle roofing project. These factors interact, and a change in one can ripple through the others. For example, a complex roof design often requires more labor, increasing the overall expense.
- Material Costs: The type of asphalt shingles you choose dramatically affects the price. Higher-quality shingles, such as architectural or dimensional shingles, offer better durability and aesthetics but come with a higher price tag compared to standard 3-tab shingles. The quantity needed, determined by your roof’s size and pitch, also plays a significant role.
- Labor Costs: Labor costs vary depending on your location, the roofing contractor’s experience and reputation, and the complexity of the roof. Steeper slopes, intricate designs, and the need for specialized equipment all contribute to increased labor expenses. The time required for tear-off (removing the old roof) is also a major component of labor costs.
- Roof Size and Complexity: A larger roof surface area naturally requires more materials and labor, leading to higher costs. Complex roof designs with multiple valleys, hips, ridges, and dormers increase both material usage and installation time, driving up the overall price. Unusual angles or difficult-to-access areas also add to the complexity and cost.
- Permits and Inspections: Obtaining necessary building permits and scheduling inspections are additional costs associated with the project. These costs vary by location and municipality.
- Underlayment and Other Materials: The cost includes underlayment (a waterproof membrane installed under the shingles), flashing (used around chimneys, vents, and other penetrations), and other necessary materials. The quality and type of these materials can also affect the total cost.
Sample Asphalt Shingle Roofing Project Budget
This sample budget provides a general idea of cost allocation. Actual costs will vary based on the factors discussed above. It’s crucial to get multiple quotes from reputable contractors to ensure accuracy.
| Cost Element | Estimated Cost | Percentage of Total |
|---|---|---|
| Materials (Shingles, Underlayment, Flashing) | $5,000 – $10,000 | 30% – 40% |
| Labor (Tear-off, Installation, Cleanup) | $7,000 – $15,000 | 40% – 60% |
| Permits and Inspections | $200 – $500 | 1% – 3% |
| Contingency (Unexpected Costs) | $500 – $1,000 | 3% – 6% |
| Total Estimated Cost | $12,700 – $26,500 | 100% |
Cost-Effectiveness of Asphalt Shingle Roofing Compared to Other Materials
Asphalt shingles generally offer a balance between cost and durability. While more expensive options like tile or slate offer longer lifespans, asphalt shingles provide a competitive value proposition.
Let’s represent a simplified cost comparison (per square foot) with a textual bar graph:
Material | Cost per Square Foot
——- | ——–
Asphalt Shingles | $3 – $8
Wood Shakes | $8 – $15
Tile | $12 – $25
Slate | $20 – $40
The bar graph would show asphalt shingles having the shortest bar, followed by wood shakes, then tile, with slate having the longest bar, illustrating the increasing cost per square foot. Remember, this is a simplified comparison; actual costs depend heavily on location and project specifics.
Choosing an Asphalt Shingle Roofing Company

Source: skywalkerroofingnc.com
Choosing the right roofing company is crucial for a successful and long-lasting roof. A poorly chosen contractor can lead to shoddy workmanship, costly repairs, and significant headaches. Taking the time to thoroughly vet potential companies will save you time, money, and stress in the long run.
Licensing and Insurance
Proper licensing and insurance are fundamental indicators of a reputable roofing company. Licensing demonstrates that the company has met the minimum standards set by your local or state authorities, indicating competency and adherence to regulations. Insurance protects you, the homeowner, from liability in case of accidents or damages during the installation process. Always ask for proof of both general liability and workers’ compensation insurance. A company unwilling to provide this information should be avoided.
Experience and Expertise
Years of experience translate to a higher likelihood of skilled workmanship and efficient project management. Inquire about the company’s history, the types of roofing projects they’ve completed, and their familiarity with asphalt shingles. Look for a company with a proven track record and positive client testimonials. Request references and contact previous clients to gauge their satisfaction with the company’s services.
Warranties and Guarantees
A reputable roofing company will stand behind its work. Inquire about the warranties offered on both materials and labor. A comprehensive warranty protects you from potential defects or issues that might arise after the installation. Understand the terms and conditions of the warranty, including the duration of coverage and the process for filing a claim. Be wary of companies offering unusually short or limited warranties.
Obtaining and Comparing Multiple Quotes
Getting multiple quotes from different roofing companies is essential for a fair comparison. This allows you to assess pricing, services offered, and overall value. Ensure that all quotes are based on the same scope of work, including materials, labor, and any additional services. Comparing quotes side-by-side allows you to make an informed decision based on factors beyond just price. For example, a slightly higher quote might be justified by superior materials or a longer warranty.
Evaluating Online Reviews and Testimonials
Online reviews and testimonials offer valuable insights into a company’s reputation and customer satisfaction. Websites like Yelp, Google My Business, and Angie’s List often contain reviews from previous clients. Pay attention to both positive and negative reviews to get a balanced perspective. Look for patterns in the feedback; consistent praise for professionalism and quality work is a positive sign, while recurring complaints about poor communication or unfinished projects should raise concerns. Be wary of companies with overwhelmingly positive reviews without any negative feedback, as this might indicate fabricated or manipulated reviews.
End of Discussion

Source: modernize.com
Choosing the right asphalt shingle roofing company and understanding the nuances of asphalt shingle roofing can save you time, money, and potential headaches down the line. By carefully considering the factors Artikeld in this guide—from material selection and installation to maintenance and contractor choice—you can ensure a durable, long-lasting, and aesthetically pleasing roof for years to come. Remember to always get multiple quotes and thoroughly vet any contractor before committing to a project. A well-maintained asphalt shingle roof is a significant investment in the longevity and value of your property.