Replace Asphalt Shingle Roof A Complete Guide
Replace asphalt shingle roof? It’s a bigger project than you might think! This guide walks you through everything from choosing the right replacement material – considering options like tile, metal, or composite – to finding a reputable contractor and keeping your new roof in top shape for years to come. We’ll cover costs, installation techniques, and even offer tips for maintaining your investment. Let’s dive in!
Replacing your asphalt shingle roof is a significant home improvement undertaking, impacting both your home’s aesthetic appeal and its long-term protection. This comprehensive guide provides a step-by-step approach to navigate the entire process, from initial planning and material selection to the final stages of installation and ongoing maintenance. We’ll break down the costs involved, explore various roofing materials, and equip you with the knowledge to make informed decisions every step of the way.
Types of Roofing Materials to Replace Asphalt Shingles

Source: modernize.com
Replacing your asphalt shingle roof offers a chance to upgrade your home’s curb appeal and longevity. Many options exist beyond asphalt, each with its own set of advantages and disadvantages concerning cost, lifespan, and aesthetic qualities. Choosing the right material depends on your budget, style preferences, and the climate where you live.
Roofing Material Comparison
Let’s examine some popular alternatives to asphalt shingles. The following table provides a general overview; actual costs and lifespans can vary based on factors like installation, quality of materials, and regional pricing.
| Material | Lifespan (Years) | Average Cost (per square) | Aesthetic Description |
|---|---|---|---|
| Tile (Clay or Concrete) | 50-100+ | $12-$30+ | Offers a classic, elegant look; available in various colors and styles, often mimicking traditional Mediterranean or Spanish architecture. Can be heavy and bulky. |
| Metal (Steel or Aluminum) | 50-75+ | $8-$20+ | Modern, sleek appearance; comes in various colors and finishes, including stone-coated options for a more textured look. Can be very durable. |
| Wood Shake/Shingles | 30-50 | $10-$25+ | Rustic, natural look; provides a warm, traditional feel. Requires more maintenance than other options. |
| Slate | 75-100+ | $20-$50+ | High-end, sophisticated look; creates a timeless, elegant appearance. Very durable and long-lasting but also heavy and expensive. |
| Composite Shingles | 30-50 | $8-$15+ | Mimics the look of wood shakes or slate but with enhanced durability and lower maintenance. Offers a wide variety of styles and colors. |
Pros and Cons of Roofing Materials
Each roofing material presents a unique set of advantages and drawbacks.
Tile (Clay or Concrete): Pros: Extremely durable, long lifespan, fire-resistant, excellent insulation. Cons: Heavy, expensive, can be brittle, requires professional installation.
Metal (Steel or Aluminum): Pros: Lightweight, durable, long lifespan, energy-efficient, low maintenance. Cons: Can dent or scratch, prone to noise during rain, may require specialized installation.
Wood Shake/Shingles: Pros: Natural beauty, good insulation, relatively affordable. Cons: Requires regular maintenance, susceptible to rot and insect damage, fire hazard.
Slate: Pros: Extremely durable, long lifespan, fire-resistant, elegant appearance. Cons: Very heavy, expensive, requires skilled installation, can be prone to cracking.
Composite Shingles: Pros: Durable, low maintenance, mimics the look of higher-end materials at a lower cost, lightweight. Cons: Shorter lifespan compared to tile or slate, may not be as aesthetically pleasing to some as natural materials.
Energy Efficiency Comparison
Energy efficiency is a crucial factor in choosing a roofing material. Different materials have varying reflective properties, impacting the amount of heat absorbed by your home. This table compares the energy efficiency of different roofing materials relative to asphalt shingles, using a scale where higher numbers indicate better energy efficiency. These values are approximations and can vary depending on the specific product and color.
| Material | Energy Efficiency (Relative to Asphalt Shingles) |
|---|---|
| Asphalt Shingles | 1.0 |
| Metal (Light-colored) | 1.5 – 2.0 |
| Tile (Light-colored) | 1.2 – 1.5 |
| Wood Shake/Shingles | 0.8 – 1.0 |
| Slate | 1.0 – 1.2 |
| Composite Shingles (Light-colored) | 1.2 – 1.4 |
Cost Analysis of Asphalt Shingle Roof Replacement
Replacing your asphalt shingle roof is a significant investment, and understanding the associated costs is crucial for budgeting and planning. This section breaks down the typical expenses involved, helping you make informed decisions.
The total cost of a roof replacement project varies considerably depending on several factors. While a simple project might seem straightforward, hidden complexities can quickly inflate the final bill. Let’s delve into the key cost components and influencing factors.
Cost Breakdown of Asphalt Shingle Roof Replacement
The primary cost components are materials, labor, and permits. Material costs encompass the shingles themselves, underlayment, flashing, nails, and other necessary components. Labor costs cover the time and expertise of the roofing crew, including tear-off, installation, and cleanup. Permits are required in most jurisdictions and ensure the project complies with building codes. Expect significant variation in these costs depending on your location and the complexity of your roof.
Factors Influencing Roof Replacement Costs
Several factors significantly impact the overall cost. The size of your roof is a major determinant, with larger roofs naturally requiring more materials and labor. The complexity of your roof design also plays a role; roofs with multiple slopes, valleys, dormers, or chimneys are more challenging and time-consuming to work on, leading to higher labor costs. Regional variations in labor rates and material prices also contribute to cost discrepancies. For example, labor costs in densely populated urban areas tend to be higher than in rural regions. The quality of materials chosen also directly impacts the cost; higher-quality, longer-lasting shingles will cost more upfront but may offer long-term savings. Finally, unforeseen issues like rotted sheathing or necessary repairs to the roof deck can add unexpected expenses.
Cost Comparison of Roofing Materials and Installation Methods
The following table illustrates the cost differences between various roofing materials and installation methods. These are estimates and can vary based on location and project specifics. Remember to always obtain multiple quotes from reputable contractors for accurate pricing.
| Material | Installation Method | Total Cost per Square Foot (Estimate) | Description |
|---|---|---|---|
| Asphalt Shingles (3-Tab) | Standard Installation | $3 – $6 | Basic, economical option; shorter lifespan than architectural shingles. |
| Asphalt Shingles (Architectural) | Standard Installation | $6 – $12 | More durable and aesthetically pleasing than 3-tab shingles; thicker and heavier. |
| Wood Shakes | Standard Installation | $10 – $20+ | Natural, aesthetically pleasing, but requires more maintenance and is susceptible to fire damage. |
| Tile (Clay or Concrete) | Standard Installation | $15 – $30+ | Long-lasting, durable, and fire-resistant; heavier than other materials and require specialized installation. |
| Metal Roofing (Standing Seam) | Specialized Installation | $12 – $25+ | Highly durable, long-lasting, and energy-efficient; requires specialized installation techniques. |
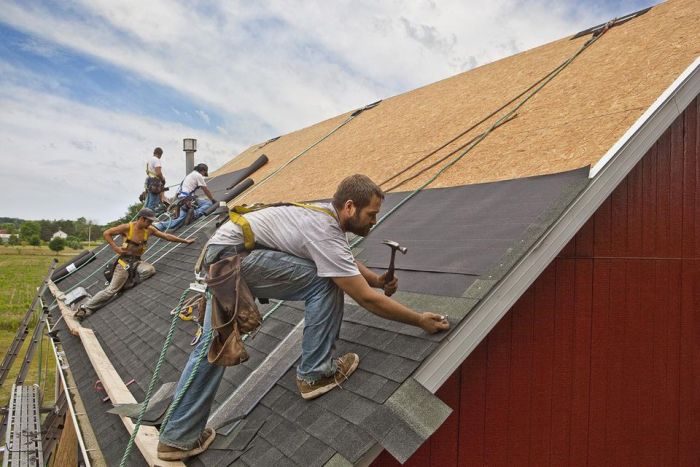
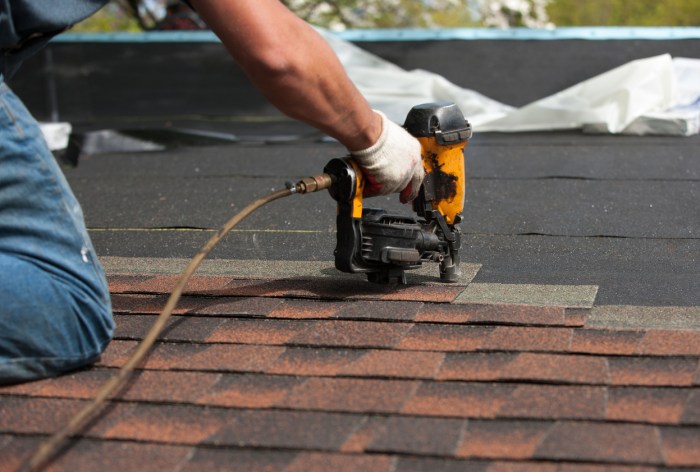
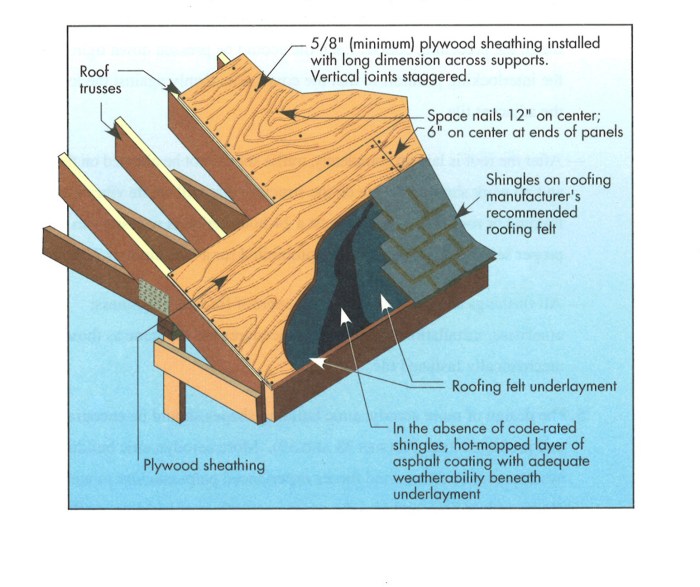
Roofing Installation Process and Techniques: Replace Asphalt Shingle Roof
Replacing your roof is a significant undertaking, requiring careful planning and execution. This section details the process of removing an old asphalt shingle roof and installing a new one, using a different roofing material. We’ll cover the step-by-step process, necessary tools, and techniques for various roofing materials.
Understanding the installation process is crucial for ensuring a long-lasting and leak-proof roof. A well-installed roof protects your home from the elements and adds significant value to your property. Improper installation can lead to costly repairs and potential structural damage.
Roof Removal and New Roof Installation
The following steps are a typical roof replacement process. Remember, safety is paramount, and professional assistance is highly recommended for complex projects.
- Preparation: This includes securing necessary permits, protecting landscaping, and setting up a safe work area. Proper safety equipment must be worn at all times.
- Roof Removal: Carefully remove the existing asphalt shingles, starting from the bottom edge and working your way up. Dispose of the old shingles responsibly. Inspect the underlying decking for damage and repair as needed.
- Underlayment Installation: Install a new underlayment, a waterproof membrane that protects the roof deck from moisture. This is crucial for preventing leaks.
- New Roofing Material Installation: This step varies significantly depending on the chosen material (tile, metal, composite, etc.). Specific techniques for each material will be discussed later.
- Flashing Installation: Install flashing around chimneys, vents, and other penetrations to prevent water from entering the roof. Proper flashing is critical for preventing leaks.
- Cleanup: Remove all debris and dispose of it properly. Inspect the completed roof for any imperfections.
Essential Tools and Equipment
Having the right tools is essential for a successful roof replacement. The following list covers essential equipment, but specific needs might vary based on the chosen roofing material and the complexity of the project.
- Safety harness and fall protection system
- Ladder (appropriate length and stability)
- Hammer
- Roofing nails
- Utility knife
- Measuring tape
- Shovel and wheelbarrow for debris removal
- Power tools (circular saw, nail gun – if applicable)
- Underlayment
- Roofing cement
Roofing Material Application Techniques
Different roofing materials require unique installation techniques. The following table summarizes the application methods, advantages, and disadvantages of several popular alternatives to asphalt shingles.
| Material | Application Technique | Pros | Cons |
|---|---|---|---|
| Clay Tile | Tiles are individually fastened to the roof deck using nails or mortar. Requires careful planning and precise placement. | Durable, aesthetically pleasing, long lifespan, fire resistant. | Expensive, heavy, requires specialized installation, can be fragile. |
| Metal Roofing (Standing Seam) | Large panels are mechanically seamed together, creating a watertight system. Often requires specialized tools and expertise. | Long lifespan, durable, low maintenance, energy efficient. | Expensive, can be noisy during rain, requires professional installation. |
| Composite Roofing (Asphalt Shingles Alternative) | Similar to asphalt shingle installation, but typically involves larger, more durable shingles. | More durable than asphalt shingles, longer lifespan, often more aesthetically pleasing options. | More expensive than standard asphalt shingles. |
Finding and Choosing a Roofing Contractor

Source: roofmaxx.com
Replacing your asphalt shingle roof is a significant investment, and choosing the right contractor is crucial for a successful project. A poorly chosen contractor can lead to shoddy workmanship, cost overruns, and lengthy disputes. This section will guide you through the process of finding and selecting a reputable and qualified roofing professional.
Criteria for Selecting a Qualified Roofing Contractor, Replace the asphalt shingle roof.
Choosing a roofing contractor requires careful consideration of several key factors. Selecting the right contractor will ensure a smooth, efficient, and high-quality roof replacement. The following criteria will help you make an informed decision.
- Licensing and Insurance: Verify that the contractor holds the necessary licenses and insurance to operate legally and protect you from liability in case of accidents or damages.
- Experience and Reputation: Look for a contractor with extensive experience in asphalt shingle roof replacements and a strong track record of satisfied customers. Check online reviews and testimonials.
- Warranty and Guarantees: Inquire about the warranty offered on both the materials and the workmanship. A reputable contractor will stand behind their work.
- Detailed Proposal: Request a comprehensive written proposal that articulates the scope of work, materials to be used, payment schedule, and project timeline.
- Communication and Professionalism: Choose a contractor who is responsive, communicative, and professional throughout the entire process. Clear and consistent communication is essential.
- References: Ask for references from past clients and contact them to inquire about their experiences with the contractor.
Obtaining and Comparing Multiple Quotes
Getting multiple quotes from different contractors is essential for comparing prices and services. This competitive process ensures you receive the best value for your money and allows you to compare not just price but also the overall quality of the proposals.
Request quotes from at least three to five reputable contractors. Ensure each quote includes a detailed breakdown of costs, materials, and labor. Compare the quotes carefully, paying attention to the details, not just the bottom line price. A slightly higher price might be justified by superior materials, a longer warranty, or a more experienced crew.
Verifying Contractor Licensing, Insurance, and Experience
Verifying a contractor’s credentials is a vital step in protecting your investment and ensuring a smooth project. Here’s a step-by-step guide:
- Check for Licensing: Contact your state’s contractor licensing board or your local regulatory agency to verify the contractor’s license status. This typically involves providing the contractor’s name and business information.
- Verify Insurance: Request proof of general liability insurance and workers’ compensation insurance. These policies protect you from financial responsibility in case of accidents or damages on your property.
- Investigate Experience: Ask for a list of previous projects and contact references to inquire about the contractor’s work quality, timeliness, and communication. Look for online reviews and testimonials to gauge their reputation.
- Examine the Contract: Carefully review the contract before signing. Ensure it includes the scope of work, payment terms, warranty information, and dispute resolution procedures. Don’t hesitate to ask questions if anything is unclear.
Maintaining a New Roof

Source: com.au
Investing in a new roof is a significant expense, so protecting that investment is crucial. Regular maintenance significantly extends the lifespan of your roof, preventing costly repairs and premature replacement. By proactively addressing minor issues, you can avoid major headaches (and expenses) down the road.
Regular roof inspections are the cornerstone of preventative maintenance. Think of it like a yearly checkup for your home – it allows you to catch small problems before they become large, expensive ones. Even seemingly minor damage, if left unchecked, can lead to significant water damage, structural issues, and the need for extensive repairs.
Roof Inspection Schedule and Procedures
A thorough roof inspection should be conducted at least twice a year, ideally in spring and fall. During these inspections, check for missing, damaged, or curled shingles; signs of water damage (staining, rotting); blocked gutters and downspouts; and any signs of pest infestation. You can often perform basic inspections yourself from the ground using binoculars, but for a truly comprehensive assessment, a professional inspection is recommended at least every three years. A professional can identify hidden problems and ensure your roof is in optimal condition.
Preventative Maintenance Tips
Regularly cleaning your gutters and downspouts is essential. Clogged gutters can lead to water backing up onto your roof, causing damage. Consider using a gutter guard system to minimize the need for frequent cleaning. Also, trimming overhanging branches helps prevent debris from accumulating on the roof and keeps branches from damaging shingles during storms. Annual cleaning and inspection of your roof will help identify issues early.
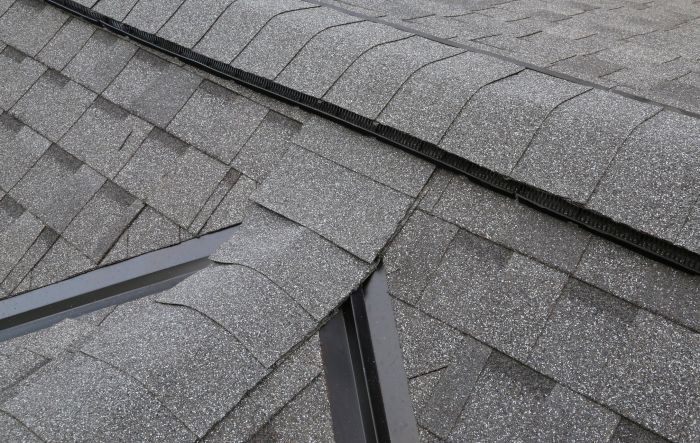
Common Roofing Problems
| Problem | Cause | Solution | Prevention |
|---|---|---|---|
| Missing or Damaged Shingles | High winds, hail, or age | Replace damaged or missing shingles immediately. For extensive damage, professional repair is recommended. | Regular inspections, proper shingle installation, and timely repair of minor damage. |
| Water Damage/Leaks | Damaged shingles, cracked flashing, clogged gutters, or poor sealing around chimneys or vents.s | Locate the source of the leak and repair the damaged area. This often requires professional help, especially for roof leaks. | Regular inspections, proper flashing installation, and gutter maintenance. |
| Algae or Moss Growth | Dampness and shade | Clean with a roof cleaning solution specifically designed for shingles. Pressure washing is generally not recommended. | Regular inspections and prompt removal of any moss or algae growth. |
| Granule Loss | Age, weathering, or impact damage | This usually indicates aging shingles and may require partial or full roof replacement. | Regular inspections, and choosing high-quality, durable shingles. |
| Flashing Issues | Age, improper installation, or weathering | Repair or replace damaged flashing. This is best left to a professional roofer. | Proper installation during initial roof construction and regular inspections. |
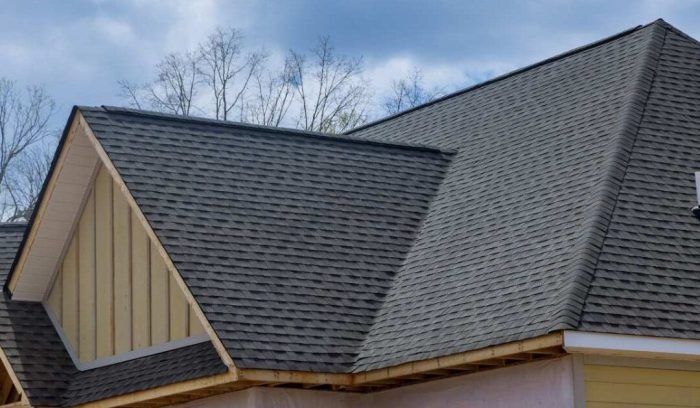
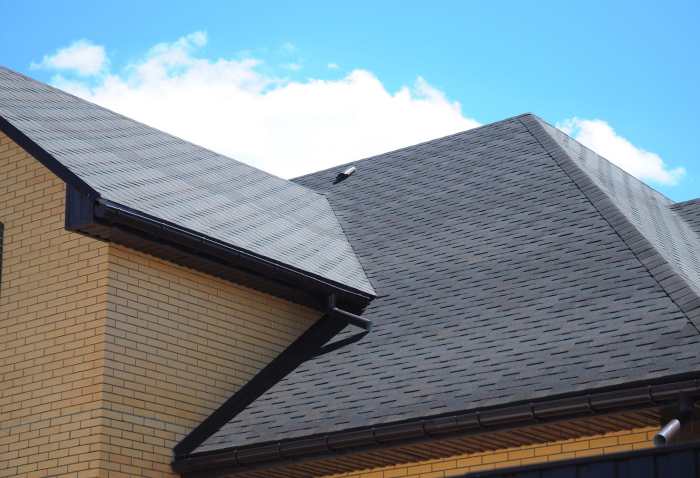
Visual Representation of Roofing Materials
Source: jacksoncontractingsite.com
Choosing a new roof involves more than just functionality; the aesthetic impact significantly influences your home’s curb appeal and overall value. The visual aspects of roofing materials—color, texture, and the overall style—play a crucial role in how your house looks and feels. Let’s explore how different materials present themselves visually.
Asphalt Shingles: Visual Characteristics and Suitability
Asphalt shingles, despite their commonality, offer a surprising range of visual options. Color palettes vary widely, from traditional browns and grays to more contemporary blues, greens, and even reds. Texture can range from smooth and sleek to more textured options that mimic the look of wood shakes or slate. The overall aesthetic is generally quite versatile. On a Victorian home, darker, more textured shingles can complement the ornate detailing, while lighter colors might be preferable for a Ranch style to create a more open and airy feel. Modern homes often pair well with sleek, flat asphalt shingles in neutral tones. Asphalt shingles can be matched with various siding materials – brick, vinyl, wood – and complement diverse landscaping styles. A dark gray asphalt shingle roof, for instance, could contrast nicely with light-colored siding and create a striking visual impact.
Clay Tiles: Visual Characteristics and Suitability
Clay tiles bring a distinct charm and historical feel to any home. The colors tend to be earth tones—reds, browns, oranges, and terracottas—although variations exist. Their texture is typically rough and uneven, lending a rustic appearance. The visual weight of clay tiles can be substantial, making them particularly suitable for larger, more imposing homes like those with a Mediterranean or Spanish Colonial style. On a Victorian home, they can provide a touch of old-world elegance. However, their heavy, textured nature might overwhelm a smaller, simpler Ranch house. Clay tiles can beautifully complement stone or stucco siding and work well with drought-tolerant landscaping, maintaining a cohesive, natural look. The deep red tones of clay tiles can beautifully contrast with lighter-colored siding, creating a striking visual balance.
Metal Roofing: Visual Characteristics and Suitability
Metal roofing has evolved beyond its industrial image, now offering a wide variety of styles and colors. While traditionally associated with standing seam panels, metal roofs can mimic the appearance of wood shakes, slate, or even traditional asphalt shingles. The color options are extensive, encompassing a wide range of shades and finishes. The texture is typically smooth, although some options offer a slightly textured surface. The clean lines of metal roofing make it particularly well-suited to modern and contemporary homes. On a Ranch style home, a metal roof can provide a sleek and updated look, while on a Victorian home, a metal roof in a dark color, designed to mimic slate, could offer a sophisticated and durable alternative to traditional materials. The reflective nature of some metal roofs can also be beneficial in warmer climates. Metal roofing can complement a variety of siding styles and landscapes, providing a sharp contrast or a harmonious blend depending on the chosen color and finish. For example, a dark grey metal roof could create a striking contrast against cream-colored siding, while a lighter color could blend seamlessly with a natural wood exterior.
Last Word
Replacing your asphalt shingle roof is a substantial investment, but with careful planning and the right information, you can ensure a successful project that enhances your home’s value and longevity. Remember to prioritize finding a qualified contractor, understanding the costs involved, and committing to regular roof maintenance. By following the steps outlined in this guide, you can confidently navigate the process and enjoy a beautiful, durable, and long-lasting roof for years to come. Happy roofing!