Applying Asphalt Shingles A DIY Guide
Applying asphalt shingles might seem daunting, but with the right knowledge and preparation, it’s a manageable DIY project. This guide walks you through each step, from understanding the different shingle types and preparing your roof to mastering installation techniques and troubleshooting common problems. We’ll cover everything you need to know to successfully shingle your roof, resulting in a durable and attractive finish. We’ll even touch on environmentally friendly practices and safety considerations.
This comprehensive guide breaks down the process into easily digestible steps, providing clear instructions and helpful tips along the way. Whether you’re a seasoned DIYer or a complete beginner, you’ll find this guide invaluable in tackling your roofing project with confidence.
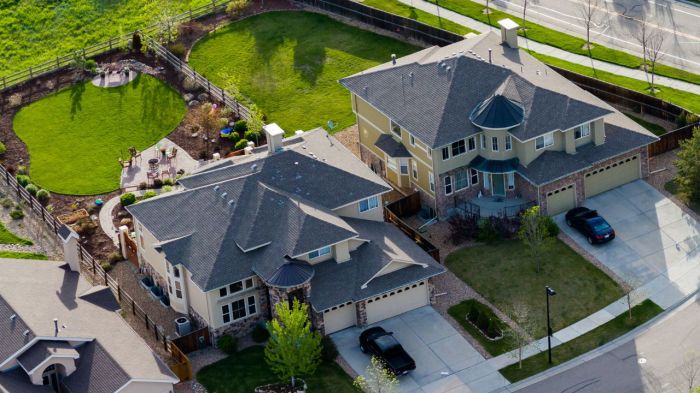
Understanding Asphalt Shingles

Source: tqn.com
Asphalt shingles are the most common roofing material in North America, offering a balance of affordability, durability, and aesthetic appeal. Understanding the different types and their characteristics is crucial for making an informed decision when choosing a roof for your home.
Asphalt Shingle Types
The market offers a variety of asphalt shingles, each with its own unique properties and price point. The main categories are 3-tab and architectural shingles. 3-tab shingles are the simpler, more economical option, while architectural shingles offer greater durability, dimensional appeal, and a more upscale look. There are also specialty shingles designed for specific climates or aesthetic preferences, such as those with enhanced wind resistance or those mimicking the look of natural slate or wood shake.
Asphalt Shingle Composition and Manufacturing
Asphalt shingles are composed primarily of fiberglass mats saturated with asphalt, a petroleum-based binder. The fiberglass provides strength and stability, while the asphalt provides waterproofing and flexibility. Mineral granules, usually made of crushed slate or ceramic, are embedded on the shingle’s surface to protect it from the sun’s UV rays and provide color and texture. The manufacturing process involves saturating the fiberglass mat with asphalt, applying the mineral granules, and then cutting the material into individual shingles. The shingles are then packaged and shipped to distributors and retailers.
Features and Benefits of Different Shingle Types, Applying asphalt shingles
- 3-Tab Shingles: These are the most basic type, characterized by their flat, three-tab design. They are relatively inexpensive and easy to install. However, they typically have a shorter lifespan compared to architectural shingles and offer less dimensional appeal.
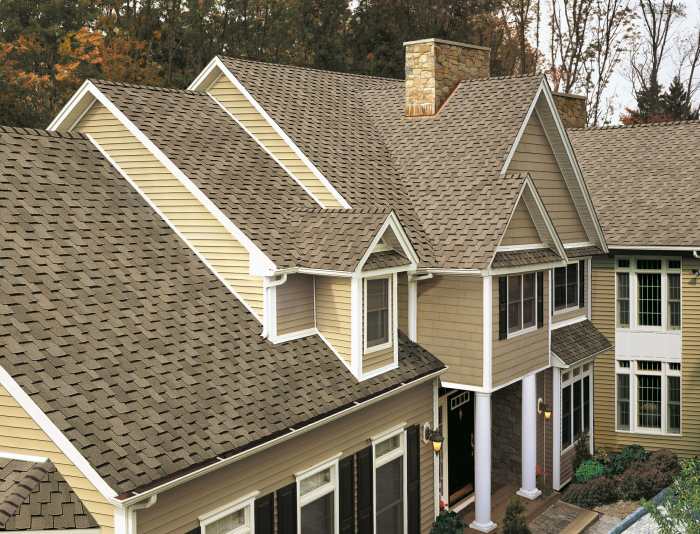
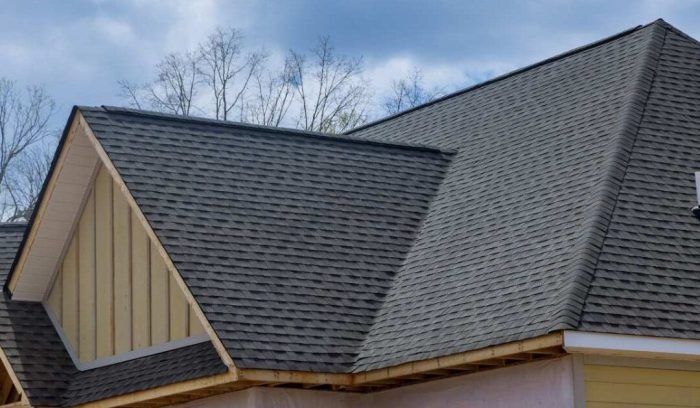
- Architectural Shingles: Also known as dimensional shingles, these offer a more textured, three-dimensional appearance. They are thicker and more durable than 3-tab shingles, providing better protection against wind damage and offering a longer lifespan. They are often made with thicker asphalt layers and heavier mineral granules. The thicker construction leads to better resistance to extreme weather.
- Specialty Shingles: This category encompasses shingles with enhanced features like increased wind resistance, impact resistance, or improved fire protection. Some specialty shingles mimic the look of more expensive materials such as slate or wood shake, providing a high-end aesthetic without the high cost.
Asphalt Shingle Lifespan and Warranty Options
The lifespan of asphalt shingles varies depending on several factors, including the quality of the shingles, the climate, and the quality of installation. Generally, 3-tab shingles have a lifespan of 15-20 years, while architectural shingles can last 25-30 years or even longer. Manufacturers typically offer warranties ranging from 20 to 50 years, depending on the shingle type and specific product. For example, a high-end architectural shingle from a reputable manufacturer might come with a 50-year warranty, while a basic 3-tab shingle might only have a 20-year warranty. It’s crucial to carefully review the warranty details, as some warranties are prorated, meaning the manufacturer’s coverage decreases over time. Also, consider the manufacturer’s reputation and track record for warranty claims.
Preparation for Application
Getting your roof ready for new asphalt shingles is crucial for a long-lasting, leak-free result. Proper preparation involves several key steps, from safety precautions to a thorough inspection of the existing roof. Overlooking these steps can lead to costly mistakes and future problems.
Roof Preparation Steps
Before you even think about touching a shingle, safety is paramount. Always wear appropriate safety gear, including a hard hat, safety glasses, and work gloves. If working at heights, use a harness and secure anchor points. Never work on a wet or icy roof. Inspect the ladder frequently and ensure it’s securely placed before climbing. If unsure about any aspect of roof work, consult a professional. Working safely minimizes risks and ensures a smooth installation process. Remember, a minor injury can derail the entire project.
- Clear the Roof: Remove all debris, old shingles, and any obstructions from the roof surface. This includes loose nails, broken pieces of wood, and any other items that could interfere with the installation process.
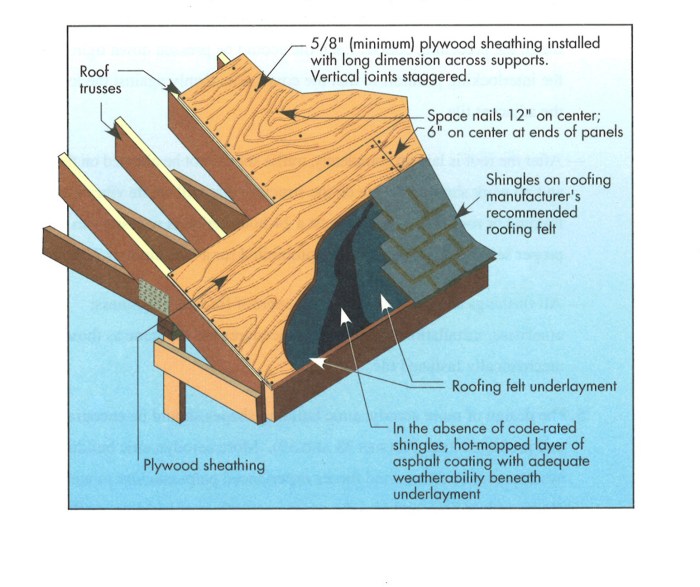
- Inspect and Repair Roof Decking: Carefully examine the existing roof decking for any damaged or rotted areas. Replace any damaged sections with new plywood or OSB sheathing, ensuring proper fastening and alignment. Damaged decking compromises the structural integrity of your roof.
- Install Ice and Water Shield: This protective layer is essential, especially around chimneys, valleys, and edges, preventing water penetration under the shingles. Apply it according to the manufacturer’s instructions, ensuring a complete seal.
- Install Underlayment: This layer provides additional protection against water damage. Overlapping layers properly ensures a watertight barrier. It should be installed evenly, avoiding wrinkles or tears. Many underlayments are available with added features, such as increased tear resistance.
- Flashing Installation: Properly install flashing around chimneys, vents, and other roof penetrations. Flashing is crucial for preventing water from entering the roof at these vulnerable points. It requires careful attention to detail and proper sealing to ensure effectiveness.
Essential Tools and Materials
Having the right tools and materials on hand makes the job easier and more efficient. A well-stocked toolbox saves time and frustration. Always check the quantity of each item before starting to avoid interruptions.
- Asphalt shingles
- Underlayment
- Ice and water shield
- Roofing nails
- Hammer
- Utility knife
- Measuring tape
- Chalk line
- Roofing hatchet or shingle cutter
- Safety glasses
- Work gloves
- Ladder
- Safety harness (if working at heights)
Roof Decking and Underlayment Inspection Checklist
A thorough inspection is critical to prevent future problems. Addressing issues early prevents bigger, more costly repairs down the line.
| Item | Condition | Action |
|---|---|---|
| Roof decking | Solid, no rot or damage | Proceed |
| Roof decking | Rotted or damaged areas | Repair or replace damaged sections |
| Underlayment | Intact, no tears or holes | Proceed |
| Underlayment | Tears or holes | Repair or replace damaged areas |
| Flashing | Secure and properly sealed | Proceed |
| Flashing | Loose or damaged | Repair or replace damaged flashing |
Proper Roof Ventilation
Adequate ventilation is crucial for shingle longevity. It prevents moisture buildup under the shingles, which can lead to rot, mold, and premature shingle failure. Proper ventilation creates airflow that helps remove moisture and keeps the attic cool. Insufficient ventilation can shorten the lifespan of your roof significantly, potentially costing you thousands of dollars in repairs. Consider adding ridge vents, soffit vents, or gable vents to ensure proper airflow.
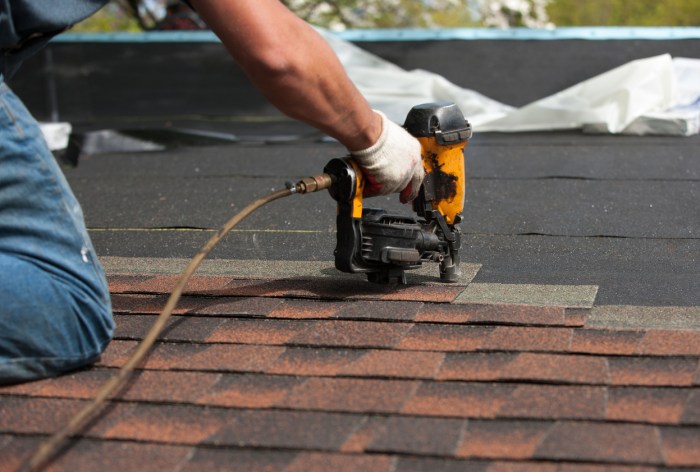
Shingle Installation Techniques

Source: com.au
Installing asphalt shingles correctly is crucial for a long-lasting, weather-resistant roof. This section details the key techniques for a professional-looking and durable finish. Proper installation ensures your roof effectively protects your home from the elements for years to come.
Starter Course Installation
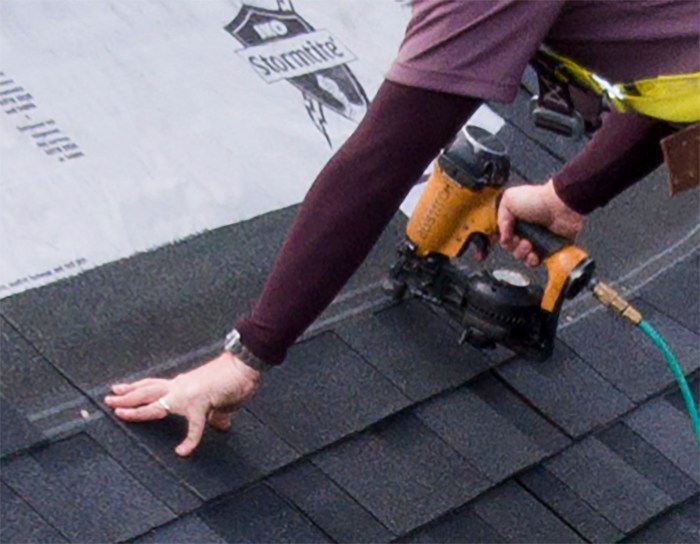
The starter course, the first row of shingles installed at the roof’s eaves, provides a solid base for the rest of the shingles. It’s essential to ensure this course is perfectly aligned and securely fastened. Begin by installing a continuous strip of ice and water shield along the eaves to prevent water damage. Then, apply the starter shingles, typically cut to a 4-inch width, overlapping the ice and water shield by approximately 2 inches. These starter shingles should be nailed securely along the upper edge using roofing nails spaced approximately 6 inches apart. Maintain a straight line and consistent spacing throughout the entire eave line for a neat and professional appearance. Proper installation of the starter course significantly reduces the risk of future leaks.
Installing Shingles Around Obstructions
Cutting and installing shingles around vents, chimneys, and valleys requires precision and careful planning. For vents and chimneys, measure and cut shingles to fit snugly around the obstruction. Overlap the shingles to create a waterproof seal, ensuring the cut edges are covered by the next shingle course. Use flashing, a thin, waterproof metal sheet, to create a barrier between the chimney or vent and the shingles, preventing water from penetrating. In valleys, where two roof slopes meet, install valley flashing first. This is typically a wider metal flashing that runs the length of the valley. Then, install shingles over the flashing, carefully cutting and overlapping them to create a watertight seal. Proper flashing installation is vital in these high-risk areas.
Shingle Overlap and Alignment
Consistent shingle overlap and alignment are critical for weather protection. Asphalt shingles are designed with overlapping tabs that create multiple layers of protection. Generally, each shingle course should overlap the previous course by approximately 6 inches. Maintain a straight, aligned shingle line from the eaves to the ridge, ensuring that the shingle butts are even. Regularly check your work using a level to prevent any slope inconsistencies. This ensures that rain and snow shed properly, preventing water buildup and potential damage. Pay close attention to shingle alignment, especially at corners and around obstructions.
Nailing Patterns and Effectiveness
The way you nail shingles affects their longevity and the roof’s overall weather resistance. Different nailing patterns offer varying degrees of security and weather protection. Here’s a comparison:
| Nailing Pattern | Number of Nails per Shingle | Nail Placement | Effectiveness |
|---|---|---|---|
| Standard | 4-6 | Two nails near the top edge of each exposed tab, spaced evenly | Good for most climates; provides adequate wind resistance |
| High-Wind | 6-8 | Additional nails near the bottom edge of each exposed tab, providing extra security | Excellent wind resistance; recommended for high-wind areas |
| Hurricane-Rated | 8+ | Multiple nails placed strategically across the shingle, maximizing hold | Superior wind resistance; essential for hurricane-prone regions |
| Double-Nailing | 8-10 | Nails placed near both top and bottom edges of the exposed tab; can involve staggered patterns. | Increased resistance to wind uplift; good for areas with strong winds and heavy snow |
Troubleshooting and Common Issues: Applying Asphalt Shingles
Asphalt shingle roofing, while durable, is susceptible to problems if not installed correctly. Understanding common issues and their solutions is crucial for ensuring a long-lasting, leak-free roof. Ignoring these problems can lead to costly repairs down the line, so proactive identification and repair are key.
Shingle Curling and Blistering
Curling, where shingle edges lift, and blistering, where bubbles appear under shingles, often result from improper installation or inadequate ventilation. Curling can be caused by insufficient nailing, allowing the wind to lift shingle edges. Blistering, on the other hand, is frequently caused by trapped moisture under the shingles, leading to expansion and buckling. Both issues compromise the roof’s weather resistance and aesthetic appeal. To prevent curling, ensure each shingle is properly nailed according to the manufacturer’s specifications, using enough nails and driving them straight. For blistering, improve attic ventilation to reduce moisture buildup. Proper underlayment installation also helps prevent moisture from reaching the shingles. Repair existing curled shingles by carefully removing and replacing them with new ones, ensuring proper nailing. For blisters, carefully cut a small slit in the blister, allowing the trapped air or moisture to escape. If the blister is extensive, replacing the affected shingle is recommended.
Granule Loss
Granule loss, where the protective granules on the shingle surface wear away, exposes the asphalt, making the shingle vulnerable to UV damage and premature aging. This is often a result of foot traffic, harsh weather conditions (like hail), or the use of low-quality shingles. Excessive granule loss can significantly reduce the lifespan of your roof and may necessitate a premature replacement. While you can’t entirely prevent granule loss, regular inspections can help identify areas of concern early. If granule loss is minimal and localized, it may not require immediate action. However, extensive granule loss often requires replacing the affected shingles.
Damaged or Missing Shingles
Damaged or missing shingles are obvious vulnerabilities that allow water penetration. Causes include impact from falling branches, strong winds, or simply age and wear. Repairing these issues is crucial for preventing leaks and further damage. Minor damage, such as small cracks, can sometimes be repaired with roofing cement. However, for larger damages or missing shingles, complete replacement is necessary. When replacing a shingle, carefully remove the damaged shingle and any underlying damaged materials. Then, install a new shingle, ensuring proper alignment and nailing.
Flashing Installation and Leak Prevention
Flashing, the metal material used around chimneys, vents, and other roof penetrations, acts as a crucial waterproof barrier. Improper flashing installation is a common cause of roof leaks. Water can easily seep under poorly installed flashing, leading to significant water damage. To prevent leaks, ensure flashing is properly installed, overlapping seams, and sealed with roofing cement. Regular inspection of flashing, particularly after storms, is essential to identify and address any potential issues promptly. If you notice any rust, damage, or gaps in the flashing, it’s crucial to repair or replace it immediately to prevent water intrusion.
Safety and Best Practices

Source: homedepot-static.com
Roofing is inherently dangerous work. Prioritizing safety is paramount to prevent serious injury or even fatality. This section details crucial safety measures and best practices for asphalt shingle installation. Remember, safety is not optional; it’s essential.
Fall Protection Measures
Falls are the leading cause of injury in roofing. A comprehensive fall protection plan is non-negotiable. This includes using appropriate safety harnesses attached to a secure anchor point on the roof, such as a sturdy ridge beam or properly installed fall arrest system. Never rely solely on ladders; they are for access and short-duration tasks only. Regular inspections of all fall protection equipment are critical, ensuring all components are in good working order and meet safety standards. Furthermore, a competent spotter should be present whenever working at heights, ready to assist in case of an emergency.
Personal Protective Equipment (PPE)
Appropriate PPE is crucial for protecting yourself from various hazards on the roof. This includes, but is not limited to, a hard hat to protect against falling objects, safety glasses or goggles to shield your eyes from debris and UV radiation, work gloves to prevent cuts and blisters, sturdy work boots with slip-resistant soles to maintain a firm grip on the roof surface, and hearing protection to reduce the noise from power tools. A long-sleeved shirt and long pants offer additional protection from the sun and sharp materials. Always ensure your PPE is correctly fitted and in good condition.
Weather Conditions and Their Impact on Installation
Weather significantly impacts asphalt shingle installation. Extreme heat can cause the shingles to become brittle and difficult to work with, increasing the risk of breakage and potentially causing burns. Conversely, extreme cold can make the shingles stiff and inflexible, leading to cracking and reduced adhesion. Rain, snow, or strong winds make working on a roof dangerous and can compromise the quality of the installation. Therefore, scheduling the work for days with moderate temperatures, low wind, and no precipitation is vital. If adverse weather conditions arise during installation, work should cease immediately. Always monitor the forecast and be prepared to postpone work if necessary.
Safe Ladder Placement and Usage
Visual Representation of Safe Ladder Placement:
Imagine a ladder leaning against the house. The base of the ladder should be positioned approximately one foot away from the wall for every four feet of height. This creates a stable angle, represented by a right-angled triangle where the ladder is the hypotenuse. The ladder should be placed on a firm, level surface, free from debris or obstacles. Always ensure the ladder extends at least three feet above the roofline to provide a secure handhold when ascending and descending. Never overreach while on a ladder; always reposition it as needed. A second person should ideally be present to stabilize the ladder during use, particularly in windy conditions. The ladder should be inspected for any damage before each use, ensuring all rungs and the supporting structure are sound. If any damage is found, the ladder should be removed from service until it is repaired or replaced.
Environmental Considerations
Asphalt shingle roofing, while durable and cost-effective, has significant environmental implications throughout its lifecycle, from manufacturing to disposal. Understanding these impacts and exploring environmentally responsible practices is crucial for minimizing the industry’s footprint. This section will cover environmentally friendly disposal methods, recycling options, manufacturing impacts, and the benefits of incorporating recycled materials.
Asphalt shingles, being a composite material, present unique challenges in terms of disposal and recycling. Improper disposal contributes to landfill overflow and potential environmental contamination. However, several avenues exist for mitigating these effects.
Environmentally Friendly Disposal Methods for Old Asphalt Shingles
Landfilling remains the most common disposal method, but it’s far from ideal. Alternatives include donating reusable shingles to Habitat for Humanity or similar organizations for reuse in smaller projects. Another option is to have them processed for recycling, although the availability of such services varies geographically. Proper disposal prevents leaching of harmful substances into the environment and conserves landfill space. The choice depends on local regulations and availability of recycling facilities.
Comparison of Asphalt Shingle Recycling Options and Their Effectiveness
Several recycling processes exist, each with varying degrees of effectiveness. Some facilities grind the shingles into aggregate for use in road construction or other applications. This method diverts waste from landfills and provides a valuable secondary use for the material. Other methods focus on recovering the asphalt and fiber components for reuse in new shingle manufacturing or other industries. The effectiveness of each method depends on factors such as the shingle composition, the efficiency of the recycling process, and the demand for the recycled materials. The success of recycling initiatives hinges on the creation of a robust and reliable infrastructure to support collection and processing. For example, some regions have established robust shingle recycling programs, leading to high diversion rates from landfills, while others still lack adequate infrastructure.
Environmental Impact of Asphalt Shingle Manufacturing
The manufacturing process of asphalt shingles consumes significant energy and resources. The extraction and processing of raw materials, such as asphalt and fiberglass, contribute to greenhouse gas emissions and environmental pollution. Furthermore, the manufacturing process itself generates waste and air pollutants. The energy intensity of the production process has a direct impact on the overall carbon footprint of asphalt shingles. For example, a study by [insert credible source and data here] may show the amount of CO2 emitted per ton of shingles produced. This highlights the importance of exploring more sustainable manufacturing practices.
Benefits of Using Recycled Materials in Shingle Production
Incorporating recycled materials in asphalt shingle production offers several environmental benefits. Using recycled asphalt, rubber, or other materials reduces the demand for virgin resources and lowers the overall environmental impact. This also reduces greenhouse gas emissions associated with resource extraction and processing. Moreover, using recycled content can potentially lower manufacturing costs and improve the sustainability profile of the product. For instance, a company using a significant percentage of recycled rubber in its shingles could market its product as an environmentally friendly option, gaining a competitive advantage. The successful implementation of these practices depends on consistent demand and readily available recycled materials.
Final Conclusion

Source: finehomebuilding.com
Successfully applying asphalt shingles is a rewarding experience, transforming the look and protection of your home. By following the steps outlined in this guide, paying attention to detail, and prioritizing safety, you can achieve a professional-looking roof that will last for years. Remember, proper preparation and attention to detail are key to a successful project. So, grab your tools, and let’s get started!