Ceiling Insulation Cost Per Square Foot
Ceiling insulation cost per square foot: Want to know how much it’ll cost to cozy up your attic? This isn’t just about saving money on your energy bills; it’s about improving comfort and boosting your home’s value. We’ll break down the factors influencing the price, from the type of insulation you choose to the accessibility of your ceiling. Get ready to become an insulation expert!
We’ll explore different insulation materials like fiberglass, cellulose, and spray foam, comparing their R-values and costs. We’ll also look at the impact of installation methods – blown-in, batts, or spray foam – and whether DIY or professional installation is best for you. Regional differences in pricing will also be covered, so you can get a realistic estimate for your location.
Factors Influencing Ceiling Insulation Cost
Getting your ceiling insulated is a great way to improve energy efficiency and comfort, but the cost can vary significantly. Several factors influence the final price per square foot, making it crucial to understand these elements before you start your project. This will help you get accurate quotes and make informed decisions.
Insulation Material Costs
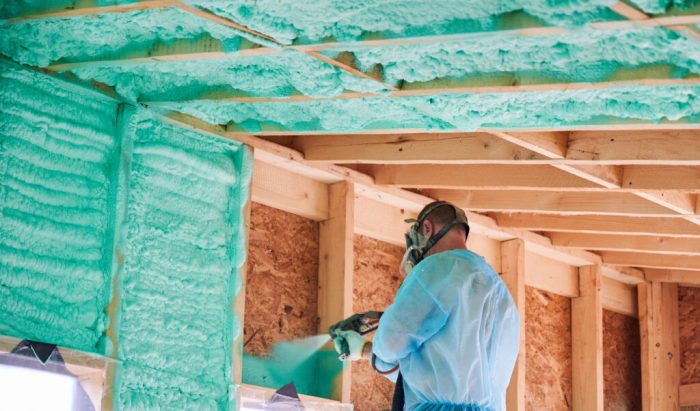
The type of insulation you choose dramatically impacts the cost. Fiberglass batts are generally the most affordable option, followed by cellulose and then spray foam. Fiberglass is readily available and easy to install, making it a budget-friendly choice for many homeowners. Cellulose, made from recycled paper, offers excellent insulation properties and is environmentally friendly. Spray foam, while more expensive upfront, provides superior air sealing and insulation, leading to long-term energy savings. The R-value, a measure of thermal resistance, also plays a role; higher R-values generally mean better insulation but often come with a higher price tag.
Labor Costs and Installation Methods
Installation costs are a substantial portion of the overall expense. The complexity of the job significantly affects labor costs. Simple, easily accessible ceilings are cheaper to insulate than those with complex layouts or difficult-to-reach areas. The installer’s experience and expertise also affect pricing; experienced installers may charge more per hour but often work more efficiently, potentially offsetting the higher hourly rate. Different installation methods also influence costs. Blown-in insulation, for instance, is generally less expensive to install than spray foam, which requires specialized equipment and expertise.
Regional Variations in Pricing
Geographic location plays a significant role in the overall cost. Labor rates, material availability, and even the prevalence of specific insulation types vary considerably across regions. Areas with a high cost of living tend to have higher labor and material costs. Supply chain issues or local regulations can also impact pricing in specific regions. For example, a rural area might have higher transportation costs for materials, leading to a higher overall cost per square foot.
Cost Comparison Table
The following table provides a general comparison of insulation costs per square foot. Remember that these are estimates, and actual costs can vary significantly based on the factors discussed above.
| Insulation Type | R-Value (per inch) | Installation Method | Cost per Square Foot (Estimate) |
|---|---|---|---|
| Fiberglass Batts | R-3.1 to R-15 | Manual Installation | $0.50 – $2.00 |
| Cellulose | R-3.7 to R-3.8 | Blown-in | $0.75 – $2.50 |
| Spray Foam (Open-cell) | R-3.6 to R-4 | Spray Application | $1.50 – $4.00 |
| Spray Foam (Closed-cell) | R-6.0 to R-7.0 | Spray Application | $3.00 – $6.00 |
Accessibility and Installation Costs
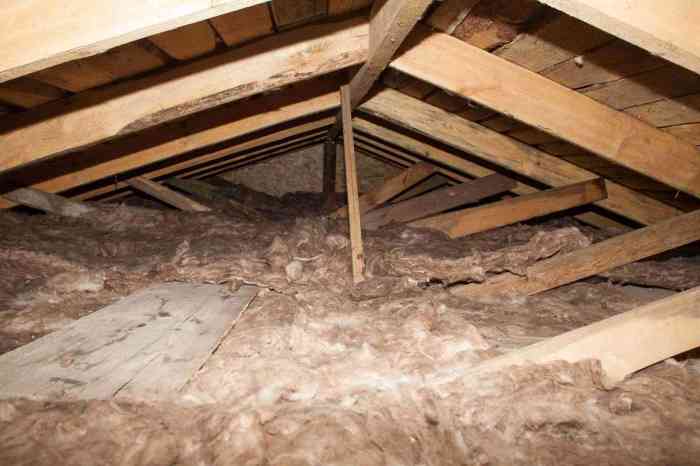
Ceiling accessibility is a crucial factor influencing installation costs. Easy-to-access attics with ample space allow for quicker and more efficient insulation installation, resulting in lower labor costs. However, difficult-to-access areas significantly increase the time and effort required, leading to higher expenses. Examples include:
- Low ceilings requiring installers to work in cramped spaces.
- Attics with limited access points or narrow openings.
- Ceilings with obstacles like pipes, ductwork, or electrical wiring that complicate installation.
- Ceilings requiring specialized equipment, such as scaffolding or lifts, to reach difficult areas.
In these cases, expect to pay a premium for the increased labor involved. The added complexity might even require more skilled labor, further driving up costs. Always discuss accessibility with your contractor upfront to get a more accurate estimate.
Average Costs Across Different Regions
Source: techlines.info
Understanding the average cost of ceiling insulation per square foot can vary significantly depending on your location within the United States. Several factors, including labor costs, material availability, and local regulations, contribute to these regional differences. Let’s examine some examples.
The following data represents estimated average costs, and actual prices may vary based on specific project details and market fluctuations. Always obtain multiple quotes from qualified installers before making a decision.
Average Ceiling Insulation Costs in Three US Regions
We’ll compare average costs in three distinct regions: the Northeast, the South, and the West.
Northeast (e.g., New York, New Jersey): The average cost of ceiling insulation installation in the Northeast ranges from $1.50 to $3.00 per square foot. This higher cost is often attributed to higher labor rates in densely populated areas and potentially higher material costs due to transportation and demand.
South (e.g., Texas, Georgia): The average cost in the South typically falls between $1.00 and $2.50 per square foot. Lower labor costs and potentially greater competition among installers often contribute to more affordable pricing in this region.
West (e.g., California, Oregon): The West Coast presents a wider range, from $1.75 to $3.50 per square foot. This variation is influenced by factors such as geographic accessibility (affecting transportation costs), the prevalence of specific insulation materials, and the overall cost of living in the region. California, for instance, often has higher costs due to stricter building codes and environmental regulations.
Regional Cost Differences Illustrated, Ceiling insulation cost per square foot
Imagine a bar graph. The horizontal axis represents the three regions: Northeast, South, and West. The vertical axis represents the cost per square foot, ranging from $0 to $4.
The Northeast bar would be the tallest, reaching nearly $3.00, reflecting the higher costs discussed. A caption below it would read: “Higher labor costs and potential material transportation expenses contribute to higher prices in densely populated areas.”
The South bar would be shorter, reaching around $2.00, indicating lower costs. It’s caption: “Lower labor costs and increased competition among installers lead to more affordable pricing.”
The West bar would have a height somewhere between the Northeast and South, perhaps around $2.75, representing the cost variation due to geography, building codes, and material availability. It’s caption: “Geographic factors, building codes, and cost of living contribute to a wider range of prices across this region.”
Urban vs. Rural Cost Comparisons
Comparing urban and rural areas reveals further cost distinctions. Urban areas generally have higher installation costs than rural areas. This difference stems primarily from higher labor costs in cities. The increased demand for skilled labor in urban centers drives up wages, directly impacting the overall cost of installation. Additionally, material transportation might be more expensive and complex in densely populated urban areas due to traffic and logistical challenges.
Conversely, rural areas often see lower labor costs and simpler transportation logistics. However, it’s important to note that while labor might be cheaper, the availability of qualified installers could be limited, potentially leading to longer wait times or fewer options to choose from. The accessibility of certain insulation materials could also be a factor in rural areas, potentially influencing overall costs.
Insulation Material Properties and Costs: Ceiling Insulation Cost Per Square Foot
Choosing the right ceiling insulation involves understanding the relationship between material properties, cost, and long-term energy savings. Different materials offer varying levels of thermal resistance, impacting both upfront expenses and your future energy bills. Let’s break down the key factors.
The thermal performance of insulation is measured by its R-value. A higher R-value indicates better insulation, meaning less heat transfer through the ceiling. This translates to lower heating and cooling costs. However, higher R-values often come with a higher initial cost. The optimal balance depends on your climate, budget, and long-term energy goals.
Common Insulation Materials and Costs
The following list details common insulation materials, their R-values, typical cost ranges per square foot (prices can vary based on location, supplier, and installation), and relevant installation considerations. These are approximate figures and should be verified with local suppliers.
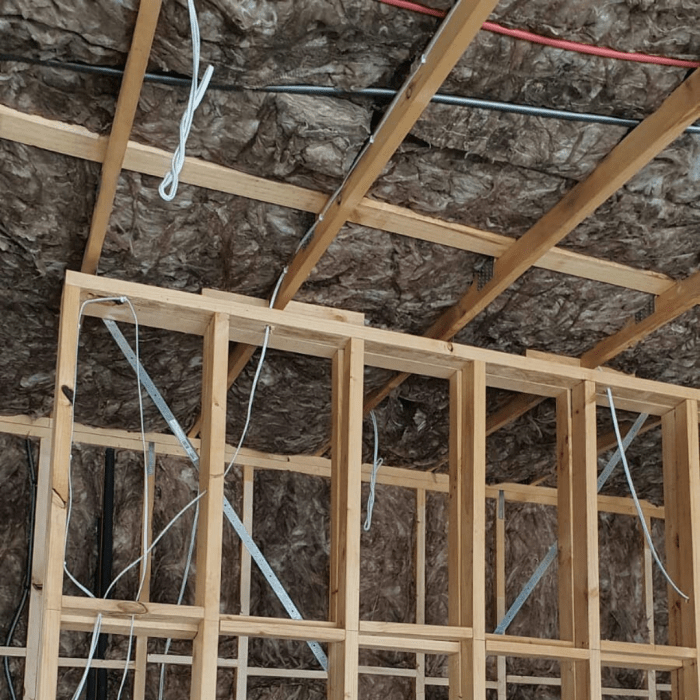
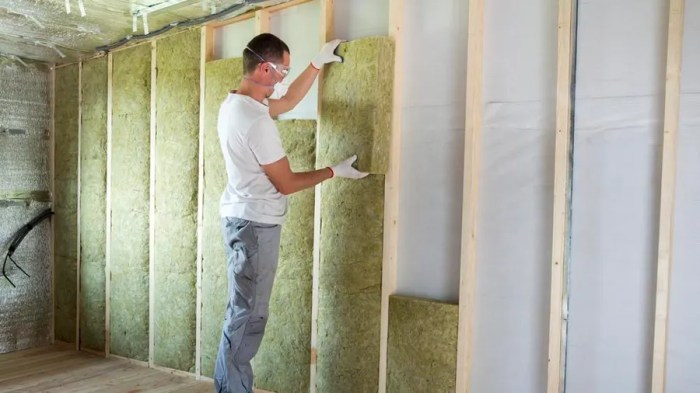
- Fiberglass Batts/Rolls: R-value: R-13 to R-38; Cost: $0.30 – $1.50/sq ft. Easy to install in standard wall and ceiling cavities. May require cutting to fit and proper handling to avoid skin irritation.
- Fiberglass Blown-in Insulation: R-value: R-13 to R-38; Cost: $0.50 – $1.80/sq ft (including installation). Suitable for hard-to-reach areas and uneven surfaces. Requires specialized equipment for installation.
- Cellulose Insulation: R-value: R-3.1 to R-3.8 per inch; Cost: $0.60 – $2.00/sq ft (including installation). Made from recycled paper, it’s a sustainable option. Installation usually requires professional help due to the need for specialized equipment.
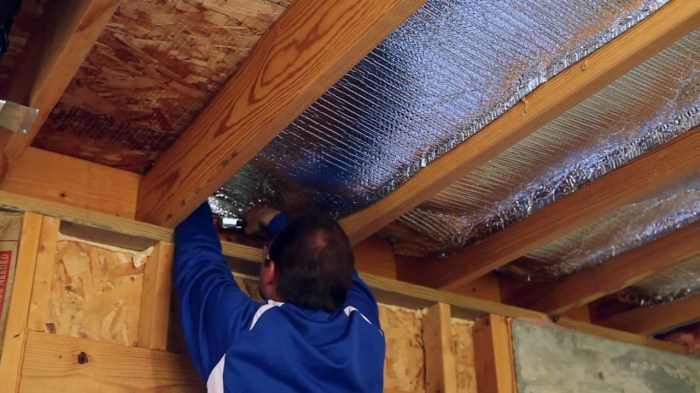
- Spray Foam Insulation (Open-cell): R-value: R-3.6 to R-3.8 per inch; Cost: $1.50 – $3.50/sq ft (including installation). Excellent air sealing properties. Requires specialized equipment and professional installation.
- Spray Foam Insulation (Closed-cell): R-value: R-6 to R-7 per inch; Cost: $2.50 – $5.00/sq ft (including installation). Offers superior moisture resistance and air sealing. Also requires specialized equipment and professional installation.
Long-Term Cost Savings of Higher R-Value Insulation
While higher R-value insulation has a higher upfront cost, the long-term energy savings can significantly outweigh this initial investment. For example, upgrading from R-13 to R-30 insulation in a typical attic could reduce heating and cooling costs by 20-30% annually, depending on climate and energy prices. This translates to substantial savings over the lifespan of the insulation (often 20-30 years or more). Consider a homeowner in a cold climate spending $1000 more upfront on higher R-value insulation; if this saves them $200 annually on heating bills, the investment pays for itself within 5 years, with substantial savings thereafter.
Installation Methods and Their Impact on Cost
Choosing the right insulation installation method significantly impacts the overall cost of your project. Factors like the type of home, accessibility of the attic or walls, and the desired R-value all influence the best approach and associated expenses. Let’s break down the most common methods and their respective costs.
Three primary methods exist for installing ceiling insulation: blown-in insulation, fiberglass batts, and spray foam insulation. Each offers unique advantages and disadvantages concerning cost, installation time, and long-term performance. Understanding these differences is crucial for making an informed decision.
Blown-In Insulation Installation Costs
Blown-in insulation, typically cellulose or fiberglass, is a popular choice for its ability to reach hard-to-access areas and fill irregular spaces effectively. Installation involves a machine that blows the insulation into the attic space. Labor costs are generally moderate, as the process is relatively quick. Material costs vary depending on the type and amount of insulation needed. Hidden costs might include potential damage to existing wiring or ductwork if not carefully handled by the installer, necessitating additional repairs.
Fiberglass Batt Installation Costs
Fiberglass batts are pre-cut pieces of insulation that are easily installed between joists. While the material cost is often lower than blown-in insulation, labor costs can be higher, particularly in attics with difficult-to-reach areas or complex layouts. The time required for installation is generally longer than with blown-in insulation. Hidden costs might involve purchasing additional materials to account for cutting and fitting the batts precisely.
Spray Foam Insulation Installation Costs
Spray foam insulation offers superior air sealing and R-value compared to other methods. However, it’s significantly more expensive, both in terms of materials and labor. Specialized equipment and skilled technicians are required for installation, increasing the overall cost. The installation process is also more time-consuming. While fewer hidden costs are usually associated with spray foam, any necessary repairs to existing surfaces before installation will significantly add to the expense.
Comparison of Insulation Installation Methods
The following table summarizes the cost and time estimates for each installation method. These are average values and can vary based on location, project specifics, and contractor pricing.
| Installation Method | Labor Cost (per sq ft) | Material Cost (per sq ft) | Installation Time (per sq ft) |
|---|---|---|---|
| Blown-in Insulation | $0.50 – $1.50 | $0.30 – $1.00 | 0.5 – 1 hour |
| Fiberglass Batts | $0.75 – $2.00 | $0.20 – $0.80 | 1 – 2 hours |
| Spray Foam Insulation | $2.00 – $5.00 | $1.50 – $4.00 | 2 – 4 hours |
Note: These costs are estimates and can vary significantly based on factors such as location, project size, and contractor. Always obtain multiple quotes from reputable contractors before making a decision.
DIY vs. Professional Installation
Source: forbes.com
Choosing between DIY and professional ceiling insulation installation significantly impacts both the final cost and the quality of the work. While DIY can seem appealing for budget-conscious homeowners, professional installation offers expertise, efficiency, and often better long-term value. This section will compare both options, outlining the advantages and disadvantages of each approach.
DIY ceiling insulation can be a cost-effective solution if you have the time, skills, and appropriate safety equipment. However, improper installation can lead to reduced energy efficiency, potential health hazards from improperly handled insulation materials, and even structural damage. Professional installers, on the other hand, possess the experience and knowledge to ensure a safe and efficient installation, maximizing energy savings and minimizing risks. They also typically have access to bulk material discounts, potentially offsetting some of the higher labor costs.
DIY Ceiling Insulation: Steps and Challenges
A DIY ceiling insulation project involves several key steps, each carrying potential challenges. First, you need to prepare the attic space, ensuring adequate ventilation and clearing any obstacles. Next, you’ll need to determine the required amount of insulation based on your attic’s dimensions and local climate recommendations. This calculation is crucial for optimal energy efficiency. Then, the actual installation process begins, which involves carefully laying the insulation material, ensuring even distribution and proper coverage. Finally, clean up any debris and inspect your work for any gaps or inconsistencies.
Potential challenges include working in a confined, often hot and dusty attic space. Improper handling of insulation materials can lead to inhalation of harmful particles, skin irritation, or eye damage. Incorrect installation can result in uneven insulation levels, reducing its effectiveness and potentially creating air leaks. Safety precautions are vital, including wearing protective gear such as a respirator, gloves, and eye protection. Using a sturdy ladder and taking breaks to avoid fatigue are also essential.
Cost Breakdown: DIY vs. Professional Installation
The cost of ceiling insulation varies significantly depending on factors such as the size of the attic, the type of insulation used, and the labor costs. A realistic cost breakdown for both DIY and professional installation is essential for informed decision-making.
| Cost Item | DIY (Example: 500 sq ft attic) | Professional Installation (Example: 500 sq ft attic) |
|---|---|---|
| Insulation Material (e.g., fiberglass batts) | $500 – $750 | $500 – $750 (Potentially lower due to bulk purchase) |
| Labor | $0 (Your time) | $1000 – $2000 (depending on location and installer) |
| Safety Equipment | $50 – $100 (Respirator, gloves, eye protection) | Included in professional fees |
| Permits (if applicable) | $0 – $100 | Included in professional fees (often handled by installer) |
| Total Estimated Cost | $550 – $850 | $1500 – $2750 |
Note: These are estimates, and actual costs can vary depending on location, material choices, and project specifics. Always obtain multiple quotes from reputable installers before making a decision.
Impact of Home Size and Ceiling Type

Source: insulationguides.com
The cost of ceiling insulation isn’t just about the square footage; it’s also significantly impacted by the size of your home and the complexity of your ceiling. Larger homes naturally require more insulation, driving up the total cost. The type of ceiling also plays a crucial role, as some designs are more challenging and time-consuming to insulate than others.
The size of your home directly correlates to the amount of insulation needed. A 1,000 square foot home will require less insulation than a 3,000 square foot home, resulting in a lower overall cost for the smaller space. This increase isn’t simply linear, however; factors like access and the ceiling type will also influence the labor costs, which can become a larger portion of the overall expense for larger projects.
Ceiling Types and Installation Complexity
Different ceiling types present varying levels of difficulty for insulation installation. This directly impacts labor costs, and therefore the final price. Flat ceilings are the easiest to insulate, while cathedral ceilings and those with complex designs or multiple levels present significant challenges.
| Ceiling Type | Installation Complexity | Impact on Cost | Example |
|---|---|---|---|
| Flat | Low | Minimal increase | Standard single-story home |
| Vaulted | Moderate | Moderate increase | High ceilings with sloped sides |
| Cathedral | High | Significant increase | Ceilings that extend to the roofline |
| Tray | High | Significant increase | Recessed ceilings with multiple levels |
Estimated Insulation Costs for Different Ceiling Sizes and Types
The following table provides estimated costs. Remember these are estimates, and actual costs can vary based on location, material availability, and specific project requirements. These figures assume professional installation.
| Ceiling Size (sq ft) | Fiberglass Batt ($1-$3/sq ft) | Spray Foam ($4-$8/sq ft) | Cellulose ($1.50-$4/sq ft) |
|---|---|---|---|
| 500 | $500 – $1500 | $2000 – $4000 | $750 – $2000 |
| 1000 | $1000 – $3000 | $4000 – $8000 | $1500 – $4000 |
| 1500 | $1500 – $4500 | $6000 – $12000 | $2250 – $6000 |
Last Recap

Source: navimumbaihouses.com
Insulating your ceiling is a worthwhile investment that pays off in both comfort and long-term savings. By understanding the factors that influence the cost per square foot – from material choices to installation methods and regional variations – you can make an informed decision that fits your budget and needs. Remember to consider not just the upfront cost but also the energy savings and increased home value you’ll gain over time. Now go forth and insulate!