Dimensional Shingle Installation Guide
Dimensional shingle installation is more than just slapping shingles on a roof; it’s about creating a durable, aesthetically pleasing, and long-lasting protective layer for your home. This guide will walk you through each step, from understanding the different shingle types and preparing your roof deck to mastering advanced techniques and troubleshooting potential problems. Get ready to become a shingle-laying pro!
We’ll cover everything from choosing the right shingles for your budget and style to the intricacies of installing them on complex roof designs. We’ll also delve into essential safety precautions, maintenance tips, and how to handle those inevitable unexpected issues that can crop up during any home improvement project. By the end, you’ll be confident in tackling your dimensional shingle installation project with skill and precision.
Understanding Dimensional Shingles: Dimensional Shingle Installation

Source: estimatorflorida.com
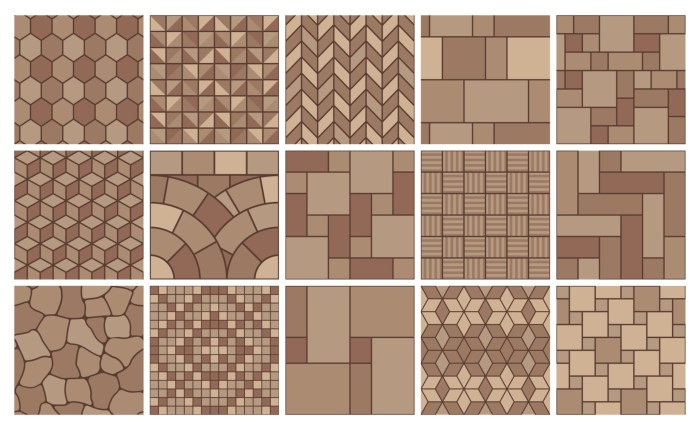
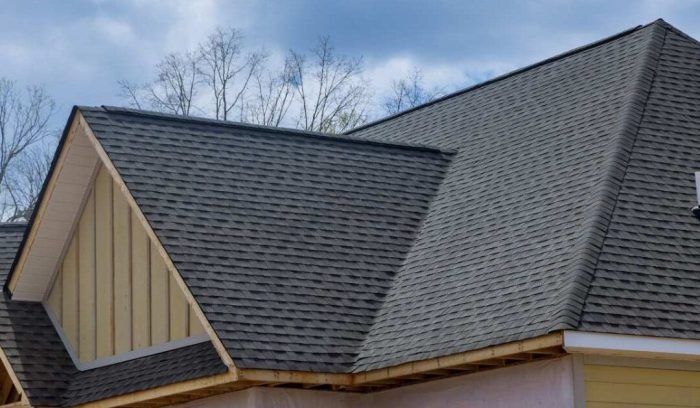
Dimensional shingles offer a significant upgrade from traditional asphalt shingles, providing a more textured and visually appealing roof. They achieve this through a more complex manufacturing process and the use of different materials and layering techniques. Understanding the various types and their properties is crucial for homeowners making roofing decisions.
Types of Dimensional Shingles
Several types of dimensional shingles are available, each with unique characteristics. These include architectural shingles (also known as laminated shingles), which are the most common type, and a newer variety of luxury shingles featuring enhanced durability and aesthetics. The differences lie primarily in their layering, material composition, and resulting texture. Architectural shingles typically have multiple layers bonded together, creating depth and shadow, while luxury shingles may incorporate additional features like thicker granules or enhanced weather resistance.
Composition and Manufacturing
Dimensional shingles are primarily composed of asphalt, fiberglass mat, and mineral granules. The manufacturing process begins with a fiberglass mat that provides the structural base. Asphalt is then applied, followed by layers of colored mineral granules for protection and aesthetic appeal. For architectural shingles, multiple layers of asphalt and granules are laminated together to create the dimensional effect. Luxury shingles may incorporate specialized polymers or other additives to enhance their durability and longevity. The precise layering and material composition vary between manufacturers and shingle lines.
Aesthetic Qualities of Dimensional Shingles
Dimensional shingles offer a wider range of aesthetic options compared to traditional three-tab shingles. Architectural shingles often mimic the appearance of wood shakes or slate, providing a more natural and upscale look. Variations in color, granule size, and layering create a variety of textures and shadowing effects, allowing for a customized aesthetic appeal. Luxury shingles often push the boundaries further, offering unique colors, larger granules, and even more pronounced textural effects. For example, some luxury shingles might have a subtle, almost woven appearance, while others could mimic the look of weathered wood or stone with remarkable detail.
Lifespan, Cost, and Maintenance, Dimensional shingle installation
The lifespan, cost, and maintenance requirements of dimensional shingles vary depending on the specific type and manufacturer. Generally, dimensional shingles offer a longer lifespan than traditional three-tab shingles, often lasting 20-30 years or more. However, higher-quality, luxury shingles can extend this lifespan even further. The initial cost is typically higher than traditional shingles, but this is often offset by the longer lifespan and reduced maintenance needs. Minimal maintenance is usually required, involving occasional cleaning of debris and inspection for any damage.
| Shingle Type | Lifespan (Years) | Cost (per square) | Maintenance |
|---|---|---|---|
| Standard Architectural | 20-25 | $80-$150 | Low |
| Premium Architectural | 25-30 | $150-$250 | Low |
| Luxury Dimensional | 30+ | $250+ | Low |
Preparation for Installation
Source: metalroofingnj.com
Getting your roof ready for dimensional shingles is crucial for a long-lasting, beautiful result. Proper preparation ensures the shingles adhere correctly and protects your home from the elements for years to come. This section covers the essential tools, safety precautions, and steps involved in preparing your roof deck for a successful installation.
Necessary Tools and Safety Equipment
Having the right tools and prioritizing safety are paramount. Improper tools can lead to inefficient work and potential damage, while neglecting safety can result in serious injury. A well-equipped installer is a safe and efficient installer.
- Safety Harness and Fall Protection System: Essential for working at heights. A properly anchored harness and lifeline are non-negotiable.
- Work Gloves: Protect your hands from cuts and blisters.
- Safety Glasses: Shield your eyes from debris and flying objects.
- Utility Knife: For cutting shingles and underlayment.
- Measuring Tape: Accurate measurements are vital for proper shingle placement.
- Hammer: For securing starter shingles and flashing.
- Chalk Line: Helps create straight lines for consistent shingle alignment.
- Roofing Nails: Specifically designed for asphalt shingles, ensuring secure fastening.
- Power Nailer (Optional but Recommended): Significantly speeds up the installation process.
- Ladder: Stable and appropriately sized for the roof height.
Roof Deck Preparation and Underlayment Application
Before even thinking about shingles, the roof deck needs to be thoroughly inspected and prepared. This involves removing any damaged or deteriorated wood, ensuring the deck is clean and dry, and then applying underlayment.
- Inspect the Roof Deck: Check for any loose, rotted, or damaged wood. Repair or replace any problematic areas.
- Clean the Roof Deck: Remove any debris, such as loose nails, old shingles, or dirt. A clean surface ensures proper adhesion.
- Apply Underlayment: This acts as a secondary water barrier, protecting your home if the shingles fail. Follow the manufacturer’s instructions for proper overlap and fastening. Common types include felt paper and synthetic underlayments. Synthetic underlayments often offer superior water resistance and tear strength.
- Install Flashing: Flashing is crucial around chimneys, vents, and other roof penetrations to prevent water leakage. Properly sealed flashing is vital.
Ventilation and its Impact on Shingle Lifespan
Adequate ventilation is often overlooked but is critical for the longevity of your roof. Proper ventilation prevents moisture buildup under the shingles, which can lead to premature aging, rot, and mold growth.
Proper attic ventilation involves both intake and exhaust vents. A balanced system ensures consistent airflow, removing trapped moisture and extending the life of your shingles and roof structure.
Pre-Installation Checklist
A comprehensive checklist ensures you haven’t missed any vital steps. A well-organized approach reduces the chance of errors and delays.
- Obtain necessary permits.
- Inspect and repair the roof deck.
- Clean the roof deck thoroughly.
- Install underlayment, ensuring proper overlap and fastening.
- Install flashing around all penetrations.
- Check and ensure adequate attic ventilation.
- Gather all necessary tools and safety equipment.
- Verify shingle quantity and type match the project specifications.
- Confirm weather conditions are suitable for installation (avoid rain or extreme temperatures).
Installation Procedures
Installing dimensional shingles is a multi-step process requiring precision and attention to detail. Proper installation ensures a long-lasting, attractive, and weather-resistant roof. This section will guide you through each step, from the initial course to final touches. Remember to always consult the manufacturer’s instructions for your specific shingle type.
The key to successful dimensional shingle installation lies in careful planning and execution. Paying attention to detail in each step will result in a beautiful and durable roof that protects your home for years to come. Remember safety first – always use appropriate safety equipment such as gloves, safety glasses, and fall protection.
Starting the First Course
The first course sets the foundation for the entire roof. Accurate placement and alignment are crucial to ensure even spacing and a professional finish. Improper installation of the first course can lead to misalignment throughout the rest of the roofing project.
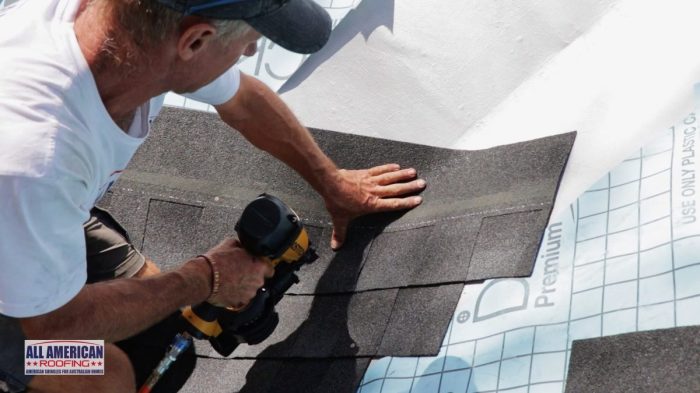
- Step 1: Establish the Starting Line. Begin at the lowest point of the roof, usually the eave. Snap a chalk line to mark the starting point for the first course of shingles. This line ensures a straight and even first row.
- Step 2: Install the Starter Strip. Apply the manufacturer-recommended starter strip along the chalk line. This provides a stable base for the first course and helps prevent wind uplift. Imagine it as the foundation for your shingle layers.
- Step 3: Positioning the First Course Shingles. Carefully position the first course of dimensional shingles, ensuring they overlap the starter strip according to the manufacturer’s specifications. Maintain consistent spacing between each shingle. Visualize a perfectly aligned row of shingles as your goal.
- Step 4: Securing the First Course. Secure the first course of shingles using roofing nails, placing them according to the manufacturer’s recommendations. Avoid over-driving nails which can damage the shingles.
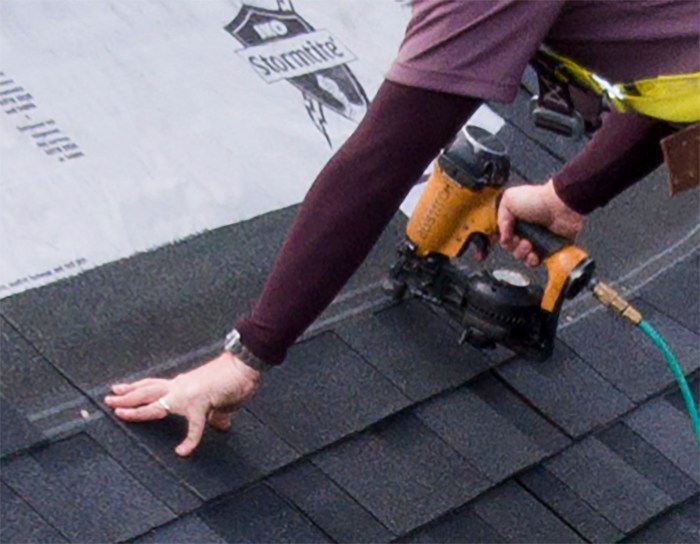
Installing Subsequent Courses
Once the first course is complete, continue installing subsequent courses, maintaining consistent overlap and alignment. This section details the process of installing the rest of the shingles on the roof.
- Step 5: Overlapping and Alignment. Each subsequent course should overlap the previous course by the recommended amount, usually specified by the manufacturer. Maintain consistent alignment across the roof. Imagine each course as a perfectly interlocking puzzle piece.
- Step 6: Nail Placement. Use roofing nails to secure each shingle, ensuring proper penetration into the sheathing. Avoid using too many or too few nails, following manufacturer guidelines for nail placement.
- Step 7: Cutting and Trimming. Around vents, chimneys, and valleys, you will need to cut and trim shingles to fit. Use sharp utility knives or tin snips for clean cuts. Picture a surgeon’s precision as you carefully trim and shape the shingles to perfectly fit the complex areas.
Cutting and Trimming Shingles
Complex roof areas require precise cutting and trimming techniques to maintain a neat and professional finish. Incorrect cutting can compromise the roof’s integrity and aesthetics.
- Step 8: Measuring and Marking. Accurately measure and mark the shingle before cutting to ensure a proper fit. Use a straight edge and a sharp pencil for precise markings.
- Step 9: Cutting Techniques. Use sharp utility knives or tin snips for clean cuts. Avoid jagged edges, as they can weaken the shingle and affect its weather resistance. Imagine a clean, precise cut – the goal is to make the cut line almost invisible.
- Step 10: Fitting and Securing. Carefully fit the cut shingle into place and secure it with roofing nails, following manufacturer recommendations.
Common Mistakes and Their Consequences
Avoiding common mistakes during installation is key to a successful roofing project. These errors can lead to leaks, premature shingle failure, and costly repairs.
- Mistake 1: Improper Nail Placement. Using too few nails or driving them incorrectly can lead to wind damage and shingle blow-off. This could lead to costly repairs and water damage to your home.
- Mistake 2: Inconsistent Overlap. Inconsistent overlap weakens the roof’s weather resistance, potentially leading to leaks and water damage. Imagine a poorly fitted jigsaw puzzle with gaps allowing water to seep through.
- Mistake 3: Poor Cutting Techniques. Jagged cuts create weak points in the shingles, making them more susceptible to damage and premature failure. This could shorten the lifespan of your roof and necessitate early replacement.
Advanced Installation Techniques
Source: solarpowerworldonline.com
Installing dimensional shingles on complex roof designs requires extra care and attention to detail. Proper techniques ensure a long-lasting, leak-proof roof, even in challenging areas like dormers, valleys, and around chimneys and vents. This section details advanced techniques to master these installations.
Installing Dimensional Shingles on Dormers and Valleys
Dormers and valleys present unique challenges due to their angles and intersections. On dormers, you’ll need to carefully plan shingle layout to maintain a consistent pattern and avoid unsightly gaps. In valleys, proper flashing and shingle layering are crucial to prevent water penetration. Start by installing underlayment, then flashing, ensuring a watertight seal at all intersections. Shingles should be cut precisely to fit the valley’s angle, overlapping appropriately to shed water effectively. Remember to use proper sealant at all critical points. For example, when installing shingles around a dormer, you might need to cut individual shingles to fit the unique angles, carefully overlapping them to ensure complete coverage and weather resistance. In a valley, the proper method of layering shingles, often referred to as “valley flashing,” prevents water from backing up and seeping under the shingles.
Flashing and Sealing Around Chimneys and Vents
Proper flashing around chimneys and vents is critical for preventing leaks. Flashing acts as a barrier, diverting water away from these vulnerable areas. Begin by installing base flashing, extending it well up the chimney or vent. Then, install step flashing, overlapping each piece to create a watertight seal. Finally, cover the flashing with counter flashing, ensuring a complete seal. Seal all seams and joints with a high-quality roofing sealant, paying close attention to any gaps or openings. For example, around a chimney, the base flashing should extend several inches beyond the chimney’s base to prevent water from running behind it. Step flashing, which overlaps like a staircase, directs water away from the chimney, while counter flashing provides an additional layer of protection.
Installing Ridge Caps and Hip and Ridge Shingles
Ridge caps and hip and ridge shingles protect the peak of your roof from the elements. Begin by installing the ridge vent (if applicable), ensuring proper airflow. Then, install the ridge cap shingles, starting at one end and working your way across. These shingles are designed to overlap, creating a weather-tight seal. Hip and ridge shingles are typically wider than standard shingles and require precise cutting and fitting. Proper alignment is key to a professional-looking finish. For example, the ridge cap shingles are usually nailed down using special roofing nails designed to not puncture the shingles. Overlapping them correctly, with proper sealant at the joints, ensures water runs smoothly off the roof peak.
Sealing Shingle Edges and Preventing Leaks
Several methods exist for sealing shingle edges and preventing leaks. Using a high-quality roofing cement or sealant on all overlaps and seams is a standard practice. Self-sealing shingles have an adhesive strip that helps create a watertight bond. In high-wind areas, additional sealant may be needed to secure the edges of shingles. Proper installation, with consistent and adequate overlap, is the most effective way to prevent leaks. For instance, using roofing cement on the edges of shingles, particularly in valleys or around chimneys, adds an extra layer of protection against water intrusion. In areas prone to high winds, using a stronger sealant and potentially adding extra fasteners can improve the shingles’ resistance to lifting.
Post-Installation Procedures
After the final shingle is in place, the job isn’t quite finished. A thorough post-installation inspection is crucial to ensure a long-lasting, leak-free roof. This involves more than just a glance; it’s a systematic check to catch any potential problems early on.
Post-Installation Inspection
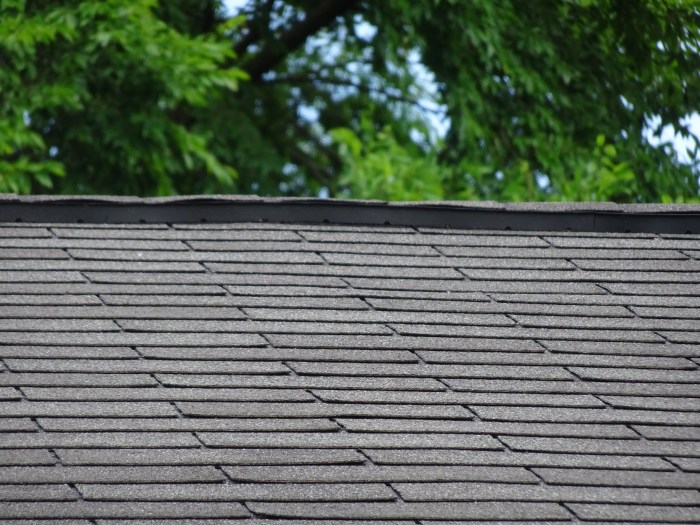
A detailed inspection should be performed to identify any defects. This includes checking for missing or damaged shingles, improperly aligned rows, nail pops, and any gaps or inconsistencies in the overall roofing system. Pay close attention to valleys, ridges, and around chimneys or vents – these areas are often more prone to issues. Use a ladder and binoculars to check for problems from a distance, and then get up close to inspect thoroughly. Any identified defects should be addressed immediately to prevent future problems. Documentation, including photos, is highly recommended for warranty purposes.
Maintenance Tasks for Extended Lifespan
Regular maintenance is key to maximizing the life of your dimensional shingles. This isn’t about constant work; it’s about proactive care. A simple annual inspection, ideally in the spring or fall, can catch minor issues before they escalate. Look for signs of wear and tear, such as loose or damaged shingles, missing granules, or moss growth. Clearing debris, such as leaves and branches, from the roof will also prevent water damage and improve the overall appearance.
Cleaning and Protection from Environmental Damage
Dimensional shingles are relatively durable, but environmental factors can still take their toll. Regular cleaning, using a soft-bristled brush and a garden hose, can remove dirt, leaves, and other debris. Avoid using high-pressure washers, as these can damage the shingles. For moss or algae growth, a specialized roof cleaning solution may be necessary. Always follow the manufacturer’s instructions carefully. Consider installing gutter guards to prevent debris from accumulating and causing damage. In areas with heavy snowfall, regular snow removal can prevent ice dams from forming and damaging the shingles.
Warranty Process and Claim Filing
Most dimensional shingle manufacturers offer warranties that cover defects in materials and workmanship. Carefully review your warranty documentation to understand the coverage and any limitations. If you discover a defect covered under the warranty, contact the manufacturer or your roofing contractor immediately. You will typically need to provide documentation, including photos of the damage and proof of purchase. The manufacturer will then assess the claim and determine the appropriate course of action, which may include repair or replacement of the damaged shingles. Keep records of all communication and correspondence related to the warranty claim.
Troubleshooting and Problem Solving
Dimensional shingle installation, while straightforward, can present challenges. Understanding common problems and their solutions is crucial for a successful and long-lasting roof. This section details troubleshooting techniques for common issues, enabling you to identify and resolve problems efficiently.
Common Installation Problems and Solutions
Many problems stem from improper preparation or installation techniques. For example, inconsistent nailing patterns can lead to shingle blow-off in high winds, while neglecting proper underlayment can result in leaks. Addressing these issues proactively prevents costly repairs later.
- Problem: Uneven shingle alignment. Solution: Carefully check the starter course and ensure all subsequent rows are aligned properly. Use a chalk line to maintain straight lines.
- Problem: Shingles lifting or blowing off. Solution: Verify proper nailing (6 nails per shingle, placed according to manufacturer’s instructions), and ensure sufficient overlap between shingles. Check for proper underlayment installation and sealing around penetrations (vents, chimneys, etc.).
- Problem: Leaks around valleys or ridges. Solution: Use appropriate flashing materials and ensure proper sealing around these critical areas. Reinforce valley flashing with additional sealant. Consider using a valley metal to provide extra protection.
Diagnosing and Repairing Shingle Defects
Shingle defects, like curling, cracking, and granule loss, often indicate underlying issues. Early detection and repair are key to preventing larger, more expensive problems down the line. Careful inspection is necessary to determine the cause and implement the appropriate fix.
- Problem: Curling shingles. Solution: Curling often results from improper installation (inadequate nailing or insufficient overlap). If only a few shingles are affected, carefully remove and replace them. If widespread, consider consulting a roofing professional to assess the underlying cause.
- Problem: Cracked shingles. Solution: Cracks can be caused by foot traffic during installation, impact damage, or age. Replace cracked shingles immediately. If cracking is widespread, it may indicate a more serious issue such as underlying structural problems.
- Problem: Granule loss. Solution: Significant granule loss reduces shingle durability and waterproofing. This can be caused by age, harsh weather, or manufacturing defects. Replace affected shingles. Excessive granule loss may point to a faulty shingle batch; contact the manufacturer.
Dealing with Unexpected Weather Conditions
Weather can significantly impact shingle installation. Planning for contingencies and understanding how to react to unexpected changes is essential for a safe and successful project.
- Problem: High winds. Solution: Postpone installation until wind speeds are manageable. Secure materials to prevent damage or blow-off.
- Problem: Heavy rain. Solution: Cover exposed areas of the roof with tarps to prevent water damage. Pause installation until the rain subsides. Ensure proper drying time before resuming work.
- Problem: Extreme heat. Solution: Schedule work for cooler parts of the day. Provide adequate hydration and breaks for workers. Use appropriate safety gear to protect from sun exposure.
Troubleshooting Flowchart
A visual guide can streamline problem identification and solution implementation. The flowchart below is a systematic approach to troubleshooting common dimensional shingle installation issues.
Start -> Identify Problem (e.g., leaks, shingle damage, uneven alignment) -> Determine Cause (e.g., improper nailing, weather damage, faulty materials) -> Implement Solution (e.g., replace shingles, repair flashing, adjust installation technique) -> Inspect Result -> Problem Resolved? (Yes/No) -> If No, seek professional assistance.
Closing Summary
Mastering dimensional shingle installation opens the door to a beautiful and protected home. Remember, proper preparation, meticulous technique, and attention to detail are key to a successful project. By following the steps outlined in this guide and addressing any potential problems proactively, you can ensure your new roof provides years of worry-free protection and enhances your home’s curb appeal. So grab your tools, and let’s get started!