How Much Does It Cost to Replace Attic Insulation?
How much does it cost to replace insulation in the attic – How much does it cost to replace insulation in your attic? That’s a question many homeowners grapple with, and the answer isn’t a simple number. The price of a new attic insulation system depends on a surprising number of factors, from the size of your attic and the type of insulation you choose to your location and whether you tackle the job yourself or hire a professional. Let’s dive into the details to help you get a clearer picture of what to expect.
This guide breaks down the costs involved in replacing your attic insulation, covering everything from material expenses and labor rates to potential hidden costs and the long-term benefits of improved energy efficiency. We’ll also compare DIY versus professional installation, helping you make an informed decision that fits your budget and skillset. Get ready to learn how to make your home warmer, cozier, and more energy-efficient!
Factors Affecting Attic Insulation Replacement Cost
Source: iko.com
Replacing attic insulation is a significant home improvement project, and the total cost can vary widely depending on several key factors. Understanding these factors will help you budget accurately and make informed decisions. This section will break down the main cost drivers to give you a clearer picture.
Attic Size and Insulation Replacement Cost
The size of your attic directly impacts the overall cost of insulation replacement. Larger attics require more insulation material and more labor hours, leading to a higher price tag. For example, a 1000 square foot attic will naturally cost more to insulate than a 500 square foot attic, even with the same materials and labor rates. The cost is generally calculated per square foot, so a larger area means a larger total cost.
Insulation Type and Pricing
The type of insulation you choose significantly affects the cost. Different materials have varying prices, installation complexities, and R-values (a measure of thermal resistance). This influences both the material cost and the labor involved in installation.
Cost Comparison of Different Insulation Types
Fiberglass, cellulose, and spray foam are common attic insulation choices, each with a different price point. Fiberglass batts are generally the most affordable option, but may not offer the same level of air sealing as other types. Cellulose insulation, made from recycled paper, is a more environmentally friendly and cost-effective alternative to fiberglass, often providing better air sealing. Spray foam insulation, while offering superior insulation and air sealing properties, is considerably more expensive than both fiberglass and cellulose. The higher cost is due to the specialized equipment and skilled labor needed for application.
Geographic Location and Labor Costs
Labor costs vary significantly across different geographic locations. Areas with higher costs of living tend to have higher labor rates for contractors. This means that the same insulation job in a high-cost area like New York City will be more expensive than in a lower-cost area like rural Nebraska. Always get multiple quotes from local contractors to compare prices.
Cost of Existing Insulation Removal
Removing existing insulation adds to the overall cost. If your attic has old, damaged, or insufficient insulation, it needs to be removed before new insulation can be installed. This removal process adds labor costs and may also involve disposal fees for the old material, particularly for materials containing asbestos or other hazardous substances. The condition of the existing insulation—whether it’s easily removed or requires specialized handling—also affects the removal cost.
Cost Per Square Foot of Various Insulation Materials
| Insulation Type | Cost per Square Foot (USD) | Installation Complexity | R-Value (per inch) |
|---|---|---|---|
| Fiberglass Batts | $0.50 – $1.50 | Low | R-3 to R-6 |
| Cellulose | $0.75 – $1.75 | Medium | R-3.8 |
| Spray Foam (Open-Cell) | $1.50 – $3.00 | High | R-3.6 |
| Spray Foam (Closed-Cell) | $2.50 – $4.00 | High | R-6 |
Breakdown of Costs
Source: owenscorning.com
Replacing attic insulation involves significant costs, primarily driven by materials and labor. Understanding these components is crucial for budgeting accurately and avoiding unpleasant surprises. This section details the cost breakdown, offering insights into material pricing, labor rates, and potential additional expenses.
Material Costs
Insulation material costs vary widely depending on the type of insulation chosen, its R-value (a measure of thermal resistance), and the quantity needed. Common types include fiberglass batts, blown-in cellulose, and spray foam. Fiberglass batts are generally the most affordable, while spray foam offers superior performance but comes with a higher price tag. The area of your attic will determine the amount of insulation required. Remember to factor in any necessary additional materials like vapor barriers or sealant.
| Insulation Type | Quantity | Approximate Cost per Unit | Total Approximate Cost |
|---|---|---|---|
| Fiberglass Batts (R-13) | 100 sq ft | $20 – $30 | $2000 – $3000 |
| Blown-in Cellulose (R-38) | 100 sq ft | $15 – $25 per bag (depending on bag size and R-value) | $750 – $1250 (based on 5-10 bags needed) |
| Spray Foam (open-cell R-3.6 per inch) | 100 sq ft, 4 inches thick | $1.50 – $3.00 per sq ft | $600 – $1200 |
*Note: Prices are estimates and can vary based on location, supplier, and specific product.*
Labor Costs
Labor costs constitute a significant portion of the total expense. Hourly rates for insulation installers vary regionally and depending on experience and the complexity of the job. In many areas, expect to pay between $40 and $80 per hour. Larger jobs might involve multiple installers, increasing the overall labor cost. The time required also depends on factors such as attic access, the existing insulation condition, and the type of insulation being installed. For example, installing blown-in cellulose is generally faster than spray foam.
Additional Labor Costs
Beyond the basic installation, additional labor costs may arise. Waste removal and cleanup are common examples. Disposal of old insulation, especially if it contains asbestos (which requires specialized handling), will add to the final bill. Proper cleanup to ensure no insulation dust remains in living spaces is also crucial and adds to the labor time.
Hidden or Unexpected Costs
It’s always wise to anticipate unforeseen expenses.
- Unexpected structural issues: Discovering damaged roof sheathing or other structural problems during insulation removal or installation may require additional repairs.
- Permitting fees: Some localities require permits for attic insulation work, adding to the overall cost.
- Increased material needs: The actual amount of insulation needed may exceed initial estimates, especially if the existing insulation is severely deficient or unevenly distributed.
- Access challenges: Difficult attic access might necessitate additional labor charges to safely and efficiently complete the installation.
- Specialized equipment rental: For certain insulation types, specialized equipment might need to be rented, adding to the expense.
DIY vs. Professional Installation
Choosing between DIY and professional attic insulation replacement involves weighing costs, risks, and long-term implications. While DIY offers potential cost savings upfront, professional installation provides expertise, warranty protection, and often faster completion. This section will detail the considerations for each approach.
Cost Comparison: DIY vs. Professional Installation
The most significant difference lies in the initial investment. DIY projects require purchasing insulation materials, renting or buying tools (like a staple gun for batts or specialized equipment for blown-in insulation), and investing time. Professional installers charge by the square foot or by the job, including material costs and labor. A typical 1500 sq ft attic might cost $2000-$5000 for professional installation, while DIY could range from $1000-$3000 depending on material choices and existing skills. However, unforeseen complications in a DIY project can quickly escalate costs.
Risks and Challenges of DIY Insulation Installation
DIY attic insulation presents several challenges. Improper installation can lead to reduced energy efficiency, compromised structural integrity, and even health risks. Working in an attic is physically demanding, involving awkward postures and exposure to extreme temperatures. Incorrect handling of insulation materials can cause breathing problems or skin irritation. Furthermore, mistakes in insulation placement can create uneven heating and cooling, leading to higher energy bills long-term. There’s also a risk of damaging existing wiring or ductwork. For example, puncturing a duct can lead to significant air leakage and costly repairs.
Long-Term Cost Savings and Potential Losses
While DIY initially seems cheaper, long-term costs can be higher if the job is not done correctly. Inefficient insulation leads to increased heating and cooling costs, potentially outweighing the initial savings. Professional installation, while more expensive upfront, guarantees better energy efficiency, resulting in lower utility bills over the lifespan of the insulation. For instance, a poorly insulated attic might increase annual energy costs by $500 or more, quickly negating any initial savings from DIY.
Warranty Considerations
Professional installers typically offer warranties on their workmanship and materials. This protects against faulty installation or defective materials. DIY installations have no such warranty, leaving you responsible for any problems that arise. A professional warranty provides peace of mind and safeguards your investment.
Comparison Table: DIY vs. Professional Installation, How much does it cost to replace insulation in the attic
| Method | Total Cost (Estimate) | Time Investment | Potential Risks |
|---|---|---|---|
| DIY | $1000 – $3000 | 1-3 days (depending on attic size and experience) | Improper installation, health hazards, structural damage, voiding home insurance |
| Professional | $2000 – $5000 | 1-2 days (depending on attic size) | Higher initial cost, potential scheduling delays |
Finding and Vetting Contractors: How Much Does It Cost To Replace Insulation In Attic
Source: cloudfront.net
Finding the right contractor for your attic insulation replacement is crucial for a successful and cost-effective project. A poorly chosen contractor can lead to shoddy workmanship, inflated costs, and potential future problems. Taking the time to thoroughly vet potential contractors will save you headaches and money in the long run.
Choosing a reputable insulation contractor requires a multi-faceted approach. It involves leveraging online resources, asking the right questions, and comparing multiple bids. Remember, the lowest price isn’t always the best deal; you need to consider experience, licensing, and insurance as well.
Finding Reputable Insulation Contractors
Several avenues exist for locating qualified contractors. Online directories, such as those provided by the Better Business Bureau (BBB) and Angie’s List, offer ratings and reviews from past clients. Local home improvement stores and building supply centers often maintain lists of recommended contractors. Word-of-mouth referrals from friends, family, or neighbors can also be invaluable. Finally, checking your state’s licensing board website ensures the contractor is legally operating and has a clean record.
Questions to Ask Potential Contractors
Before committing to any contractor, it’s vital to ask specific questions to assess their qualifications and approach. This ensures you are comfortable with their expertise and the project plan.
- How long have you been in business, and what is your experience with attic insulation projects of similar size and scope?
- Are you licensed and insured? Can you provide proof of your licenses and insurance certificates?
- What type of insulation do you recommend for my attic, and why? Can you explain the R-value and its significance?
- Can you provide references from past clients? I would like to contact them to discuss their experience.
- What is your process for preparing the attic before installation? What safety precautions will be taken?
- What is your warranty policy, and what does it cover?
- Can you provide a detailed breakdown of the costs involved, including materials and labor?
- What is your estimated timeframe for completing the project?
- What is your payment schedule?
The Importance of Multiple Quotes
Obtaining at least three quotes from different contractors is strongly recommended. This allows for a direct comparison of pricing, materials, and proposed approaches. Don’t base your decision solely on price; consider the overall value proposition offered by each contractor. Comparing quotes helps identify potential inconsistencies or inflated pricing, ensuring you get a fair deal.
Key Elements of an Insulation Installation Contract
A comprehensive contract protects both the homeowner and the contractor. It should Artikel all aspects of the project, preventing misunderstandings and disputes.
- Project Scope: A detailed description of the work to be performed, including the type and amount of insulation, preparation work, and cleanup.
- Materials: Specific details about the insulation materials to be used, including manufacturer, R-value, and quantity.
- Payment Schedule: A clear article of payment milestones, with percentages tied to completion stages.
- Timeline: A realistic timeframe for project completion, including start and end dates.
- Warranty: Details of the warranty provided on both workmanship and materials.
- Dispute Resolution: A clear process for resolving any disputes that may arise.
- Permits: Specification of who is responsible for obtaining any necessary permits.
Contractor Qualification and Experience Checklist
Before hiring, thoroughly assess the contractor’s qualifications and experience.
- Verify licensing and insurance through official state channels.
- Check online reviews and ratings on reputable platforms like the BBB.
- Request and verify references from previous clients.
- Assess their understanding of building codes and insulation best practices.
- Review their proposed project plan for thoroughness and feasibility.
- Ensure their contract is detailed, comprehensive, and legally sound.
Energy Savings and ROI
Upgrading your attic insulation is a significant investment, but the long-term energy savings and increased home value can make it a worthwhile endeavor. By reducing heat loss in winter and heat gain in summer, improved insulation directly impacts your energy bills, leading to substantial cost reductions over time. This section will explore how to estimate those savings and determine the return on your investment.
Improved attic insulation dramatically reduces the amount of energy your heating and cooling systems need to work. Think of it like adding a thicker coat to your house – the better the insulation, the less energy escapes or enters. This translates to lower utility bills, a more comfortable home, and a smaller carbon footprint. The extent of these savings depends on several factors, including your current insulation level, the climate you live in, and the type of insulation you choose.
Energy Savings Based on R-Value
The R-value of insulation represents its resistance to heat flow. A higher R-value means better insulation. Let’s consider a hypothetical example: Imagine a 1,500 square foot home with currently inadequate attic insulation (R-13). Upgrading to R-38 could result in significant savings. In a climate with moderate heating and cooling needs, this improvement might reduce annual energy costs by 20-30%, potentially saving $300-$450 annually, depending on energy prices. In colder climates, savings could be even more substantial. For instance, a home in a northern state might see savings closer to 40%, depending on the size of the house and energy consumption habits.
Calculating Return on Investment (ROI)
Calculating the ROI for attic insulation involves comparing the initial cost of the project to the cumulative energy savings over a specific period. Here’s a simplified formula:
ROI = (Total Energy Savings – Total Insulation Cost) / Total Insulation Cost * 100%
Let’s use the previous example. If the insulation upgrade costs $2,000 and saves $400 annually, the ROI after 5 years would be:
ROI = ($400/year * 5 years – $2,000) / $2,000 * 100% = 100%
This means the investment pays for itself in 5 years, and any further savings after that represent pure profit. Keep in mind that this is a simplified calculation; actual savings may vary.
Long-Term Benefits
Beyond the immediate energy savings, improved attic insulation offers several long-term advantages. A more energy-efficient home is more comfortable, with more stable temperatures throughout the year. This can lead to improved indoor air quality and reduced wear and tear on your HVAC system, potentially extending its lifespan. Moreover, energy-efficient homes are generally more attractive to potential buyers, increasing your home’s resale value. Many appraisers consider energy efficiency upgrades when assessing a home’s worth.
Energy Savings Comparison Over 10 Years
The following table compares estimated energy savings for different insulation types over 10 years, assuming a 1500 sq ft home and moderate climate conditions. These are estimates and actual savings will vary based on numerous factors.
| Insulation Type | Initial Cost (Estimate) | Average Annual Savings (Estimate) | 10-Year Savings |
|---|---|---|---|
| Fiberglass (R-13 to R-38) | $1500 – $2500 | $300 – $500 | $3000 – $5000 |
| Cellulose (R-38) | $2000 – $3000 | $400 – $600 | $4000 – $6000 |
| Spray Foam (R-38) | $3000 – $5000 | $500 – $700 | $5000 – $7000 |
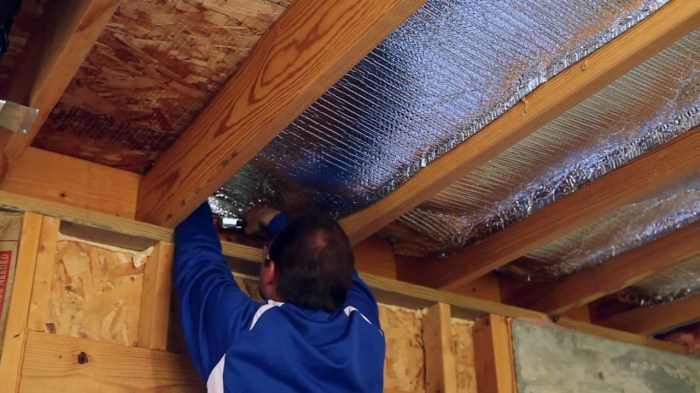
Visual Aids
Source: futurecdn.net
Understanding the different types of attic insulation is crucial for assessing replacement costs and ensuring optimal energy efficiency. Visualizing the materials helps in understanding their properties and how they perform in your attic. The following descriptions will help you picture the various insulation options.
Fiberglass Insulation Appearance and Texture
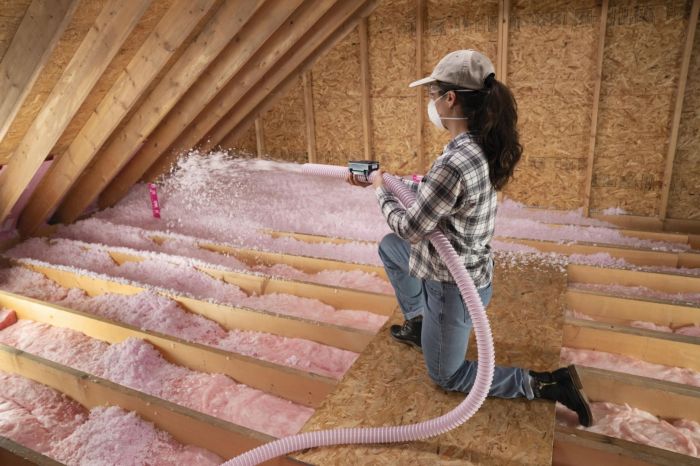
Fiberglass insulation, a common choice for attics, typically appears as fluffy, pink or bright yellow batts or rolls. The color is due to the addition of dyes. The density varies depending on the R-value; higher R-value insulation will generally appear denser and more compact. It has a slightly scratchy texture, and the individual fibers are visible upon close inspection. The batts are relatively uniform in thickness and are easily handled, though precautions should be taken to avoid skin irritation from the fibers. Older fiberglass insulation may appear more compressed or settled than newer material.
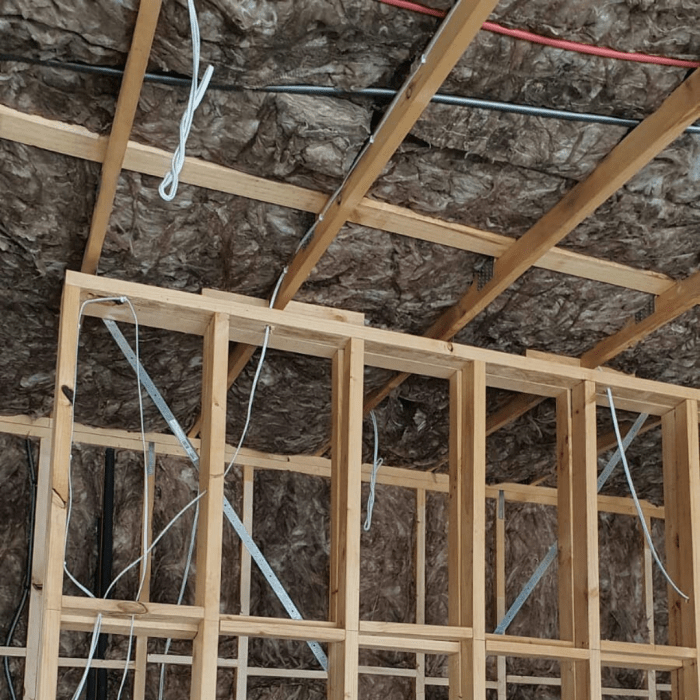
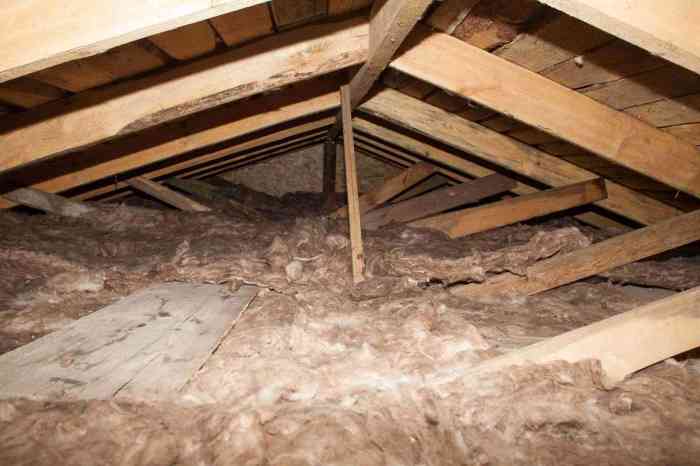
Cellulose Insulation Composition and Appearance
Cellulose insulation is made from recycled paper products and is treated with borates for fire resistance. When installed, it appears as a loose-fill material, resembling light brown or grey clumps. It’s less uniform in appearance than fiberglass batts. The texture is somewhat fluffy and can be slightly dusty. The consistency is often described as similar to shredded newspaper, but it is much more densely packed after professional installation. It conforms well to irregular surfaces, filling gaps and crevices effectively.
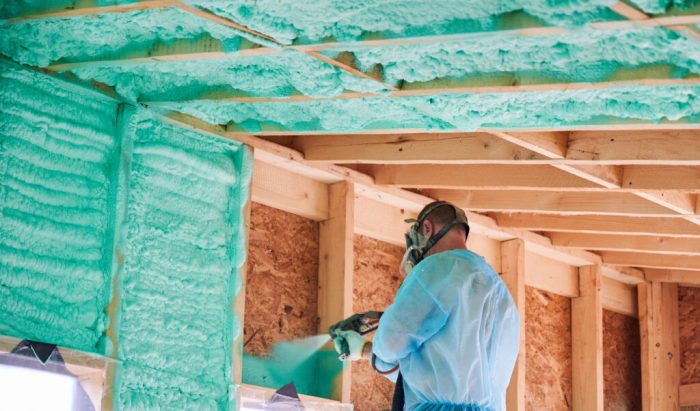
Spray Foam Insulation Texture and Application
Spray foam insulation is applied as a liquid and expands to fill the space, creating a seamless, airtight barrier. The texture after application is smooth and continuous. Open-cell spray foam has a slightly porous appearance and is typically light tan or beige. Closed-cell spray foam is denser and has a smoother, almost plastic-like finish, often appearing a similar light color. The application process involves specialized equipment, resulting in a uniform layer across the attic’s surfaces, including rafters and joists.
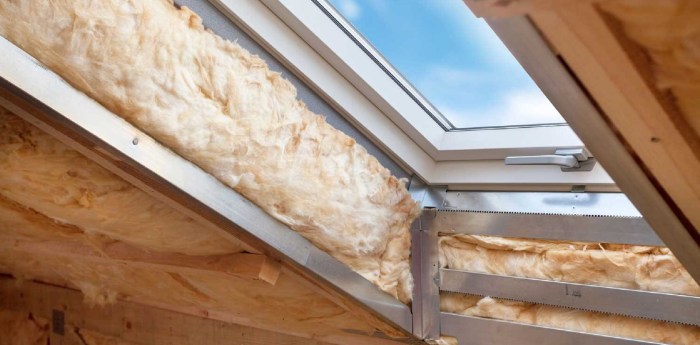
Properly Insulated Attic Appearance
A properly insulated attic, regardless of the insulation type used, will exhibit a consistent and even layer of insulation across all surfaces. There should be no visible gaps or areas where insulation is missing or insufficient. For batts or rolls, the material should be evenly distributed and neatly placed, filling the spaces between rafters or joists. For loose-fill insulation, the material should be evenly distributed to the desired depth, covering all surfaces without significant settling or clumping. For spray foam, a uniform, continuous layer should be present, adhering securely to all surfaces. A well-insulated attic will look clean, organized, and free of any exposed framing members.
Closing Notes
Replacing your attic insulation is a significant investment, but one that can offer substantial returns in the form of lower energy bills and increased home comfort. By carefully considering the factors we’ve discussed – attic size, insulation type, labor costs, and the DIY versus professional installation debate – you can develop a realistic budget and plan. Remember to get multiple quotes from reputable contractors, ask plenty of questions, and thoroughly review any contracts before committing to a project. A well-insulated attic is a smart investment in your home’s future, so make an informed choice and enjoy the benefits for years to come!