How Much Is It To Install Insulation?
How much is it to install insulation? That’s a great question, and the answer isn’t a simple number. The cost of insulating your home depends on a lot of factors, from the size of your house and the type of insulation you choose to your location and whether you hire a professional or tackle the job yourself. We’ll break down all the variables that affect the final price, helping you get a realistic estimate and make informed decisions about improving your home’s energy efficiency.
This guide covers everything from understanding the different types of insulation and their costs per square foot to comparing DIY versus professional installation. We’ll also look at potential hidden costs, how to get multiple quotes, and, importantly, the potential return on investment you can expect from a well-insulated home. Get ready to learn how to make your home warmer, more comfortable, and more energy-efficient, all while staying within your budget.
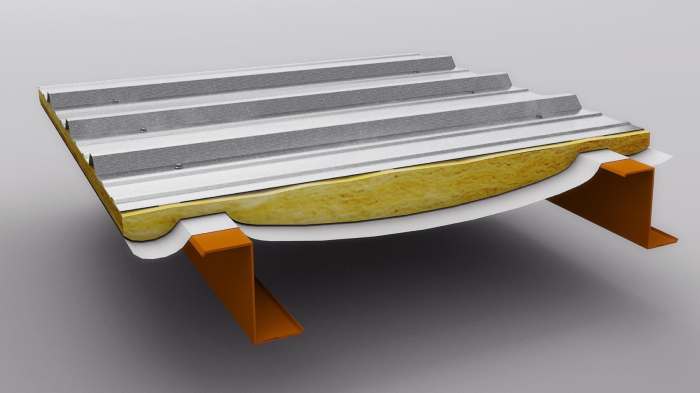
Factors Affecting Insulation Installation Cost
Source: cloudfront.net
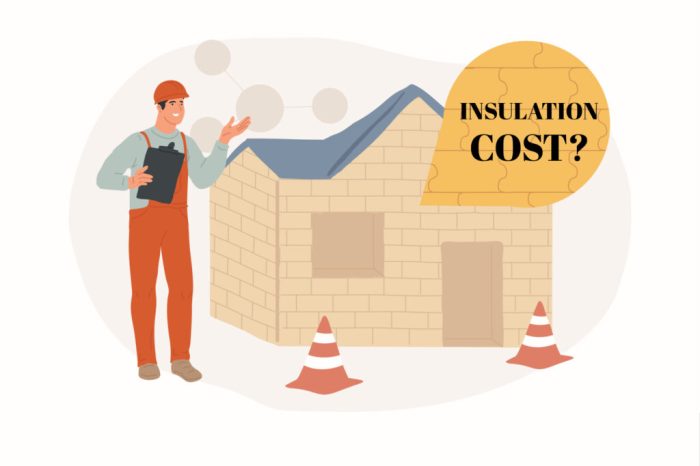
Getting your home properly insulated is a worthwhile investment, boosting energy efficiency and comfort. However, the total cost can vary significantly. Several key factors influence the final price, and understanding these will help you budget effectively.
Home Size
The larger your home, the more insulation material and labor will be required, leading to a higher overall cost. A 1,500 square foot house will naturally need more insulation than a 1,000 square foot house. This is a directly proportional relationship: more square footage equals a higher installation price. Consider the total square footage of your home’s attic, walls, and crawl spaces when estimating costs.
Insulation Material
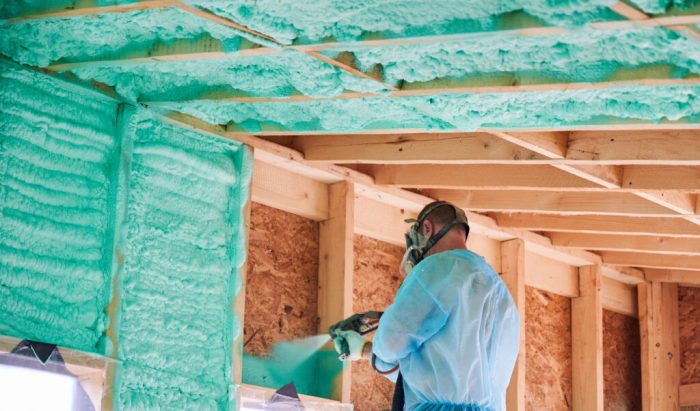
Different insulation materials come with different price tags. Fiberglass batts are generally the most affordable option, offering a good balance of cost and effectiveness. Cellulose insulation, made from recycled paper, is slightly more expensive but often boasts better R-value (insulation effectiveness) per inch. Spray foam insulation, while offering superior air sealing and R-value, is typically the priciest option due to the specialized equipment and skilled labor needed for installation.
Installation Location
Installing insulation in different areas of your home varies in complexity and cost. Attic insulation is often the most straightforward and therefore least expensive, as access is usually relatively easy. Wall insulation can be more challenging, potentially requiring more labor-intensive methods like drilling holes for blown-in insulation or removing sections of drywall. Crawl space insulation presents its own set of difficulties, depending on the accessibility and condition of the crawl space.
Labor Costs and Geographic Location
Labor costs are a significant part of the overall installation expense. These costs fluctuate depending on your geographic location. Areas with higher labor costs, such as major metropolitan areas, will typically have higher insulation installation prices compared to smaller towns or rural areas. The availability of skilled installers and the local demand also play a role. For example, a city with a booming construction industry might see higher labor rates than a more rural area.
Estimated Cost Per Square Foot
| Insulation Type | Cost per Square Foot (USD) | Notes |
|---|---|---|
| Fiberglass Batts | $0.50 – $1.50 | Price varies based on R-value and thickness. |
| Cellulose Insulation | $1.00 – $2.00 | Often higher initial cost but better R-value. |
| Spray Foam Insulation | $2.00 – $6.00+ | Most expensive, but superior air sealing and R-value. |
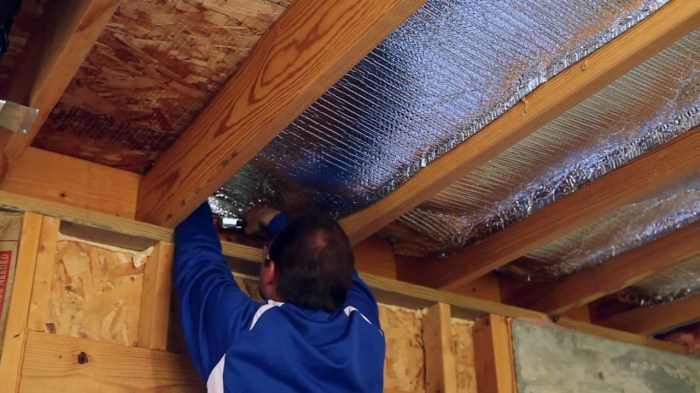
Breakdown of Installation Costs
Source: storables.com
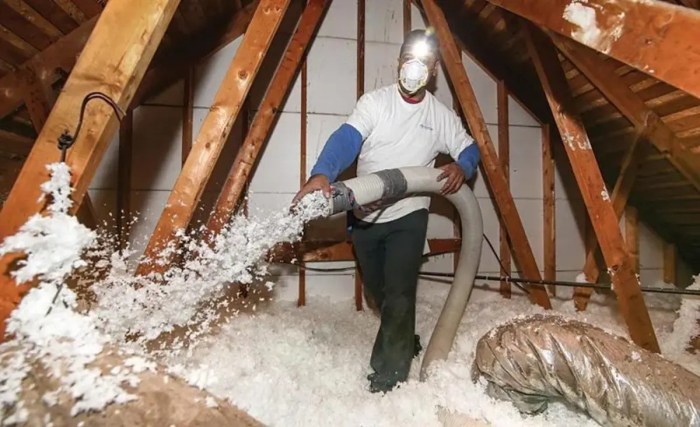
Insulation installation costs can vary significantly depending on several factors, as previously discussed. Understanding the breakdown of these costs will help you budget effectively and avoid unpleasant surprises. This section provides a detailed look at the typical expenses involved.
The primary components of insulation installation costs are materials and labor. Material costs depend heavily on the type of insulation chosen (batt, spray foam, blown-in, etc.), its R-value (a measure of thermal resistance), and the amount needed to cover your home’s square footage. Labor costs, on the other hand, are influenced by factors like the accessibility of the areas to be insulated, the complexity of the job, and the installer’s experience and location. Generally, labor represents a significant portion of the total cost.
Material Costs
Material costs vary widely. For example, fiberglass batts are typically the most affordable option, while spray foam insulation commands a higher price due to its superior insulating properties and the specialized equipment required for its application. Blown-in cellulose or fiberglass insulation falls somewhere in between. The price per square foot will also change based on the R-value; higher R-value insulation typically costs more but provides better long-term energy savings. Consider obtaining multiple quotes from different suppliers to compare prices for the specific insulation type and R-value you’ve chosen.
Labor Costs
Labor costs are typically charged by the hour or per square foot, and can vary based on geographical location and the installer’s experience. A more experienced installer may charge more, but their expertise could result in a faster, more efficient, and ultimately better-insulated home. Expect to pay more for complex jobs, such as insulating attics with difficult-to-reach areas or those requiring specialized equipment. Always obtain detailed quotes outlining the hourly rate or per-square-foot pricing before agreeing to the work.
Additional Costs
Beyond materials and labor, several additional costs can significantly impact the overall project expense. It’s crucial to factor these in from the start to avoid unexpected financial burdens.
- Permits: Some localities require permits for insulation installation, particularly for larger projects or those involving significant structural modifications. Permit fees vary by location.
- Removal of Existing Insulation: If you’re replacing existing insulation, the cost of removing it must be factored into the total expense. This can be particularly labor-intensive if the old insulation is dense, damaged, or contains asbestos (which requires specialized and more expensive removal procedures).
- Waste Disposal: Proper disposal of old insulation materials might involve additional fees depending on your local regulations and the type of insulation being removed.
- Clean-up: After the installation, there might be some debris or dust that requires cleaning, adding a small extra cost.
Potential Hidden Costs
Some costs are not always immediately apparent during the initial quote. Being aware of these potential hidden costs can help you avoid financial surprises.
- Unexpected Access Issues: The installer may encounter unforeseen difficulties accessing areas needing insulation, leading to increased labor costs. For example, discovering unexpected obstructions in the attic or walls.
- Material Shortages or Delays: Supply chain issues can sometimes lead to material shortages or delays, potentially increasing the overall project timeline and cost.
- Unforeseen Repairs: During the installation, the installer may discover damage or deterioration that requires repair before insulation can be installed, adding to the expense.
Calculating Total Cost
A basic calculation of insulation installation cost involves determining the square footage of the area to be insulated and multiplying it by the cost per square foot for both materials and labor. For example:
Total Cost = (Square Footage * Material Cost per Square Foot) + (Square Footage * Labor Cost per Square Foot) + Additional Costs
Let’s say you need to insulate 1000 square feet of attic space. Fiberglass batts cost $0.50 per square foot, and labor is $2.00 per square foot. Additional costs (permits, removal of old insulation) are estimated at $500. The calculation would be:
Total Cost = (1000 sq ft * $0.50/sq ft) + (1000 sq ft * $2.00/sq ft) + $500 = $3000
Remember, this is a simplified example. Always get detailed quotes from multiple contractors to ensure accuracy and avoid unexpected costs.
Finding and Choosing an Installer
Getting the best insulation job means more than just choosing the right type of insulation; it also involves selecting a qualified and reliable installer. This decision significantly impacts the quality of your installation, the longevity of your insulation, and ultimately, the cost-effectiveness of your project. Choosing wisely will save you money and headaches in the long run.
Finding the right insulation installer requires careful research and comparison. Don’t settle for the first contractor you find; take the time to gather information and make an informed decision.
Obtaining Multiple Quotes
Getting at least three quotes from different insulation installers is crucial. This allows you to compare pricing, services offered, and the overall professionalism of each contractor. Don’t just focus on the lowest price; consider the value you’re getting for your money. A slightly higher quote might be justified by superior materials, a more experienced crew, or a comprehensive warranty. Make sure each quote details the scope of work, including the type and amount of insulation, and any additional services like demolition or cleanup.
Comparing Installer Qualifications and Experience
When comparing installers, consider their experience with similar projects, their familiarity with the type of insulation you’ve chosen, and their overall reputation within the industry. Look for installers who have been in business for several years and have a proven track record of successful installations. Inquire about their crew’s experience and training, as well as their methods for ensuring a quality installation. A company with a long-standing presence and positive feedback indicates reliability and expertise.
Verifying Licensing and Insurance
Always verify that potential installers possess the necessary licenses and insurance. Licensing ensures they meet minimum professional standards, while insurance protects you in case of accidents or damage during the installation process. Request copies of their license and insurance certificates; reputable companies will readily provide these documents. Check with your local licensing board to confirm the validity of their license. The absence of proper licensing and insurance can expose you to significant financial risks.
Checking Customer Reviews and Testimonials
Before hiring any installer, thoroughly research their online reputation. Check websites like Yelp, Google Reviews, and Angie’s List for customer reviews and testimonials. Pay attention to both positive and negative feedback. A few negative reviews aren’t necessarily a deal-breaker, but a pattern of complaints should raise red flags. Look for consistent themes in the reviews, such as communication issues, poor workmanship, or unresolved problems. Positive reviews highlighting professionalism, responsiveness, and quality work are a good sign.
Factors to Consider When Selecting an Insulation Installer
| Factor | Description | Importance | How to Verify |
|---|---|---|---|
| Licensing & Insurance | Valid licenses and adequate insurance coverage. | Essential for protection and quality assurance. | Request copies of certificates; verify with licensing boards. |
| Experience & Reputation | Years in business, positive reviews, and expertise in your insulation type. | Indicates reliability and quality of work. | Check online reviews, request references, inquire about past projects. |
| Pricing & Payment Terms | Competitive pricing, clear payment schedule, and detailed quotes. | Avoid hidden costs and unexpected expenses. | Compare multiple quotes; scrutinize contract details. |
| Warranty & Guarantees | Warranty on materials and workmanship. | Protects against defects and faulty installations. | Review the warranty terms carefully; ensure it covers all aspects of the job. |
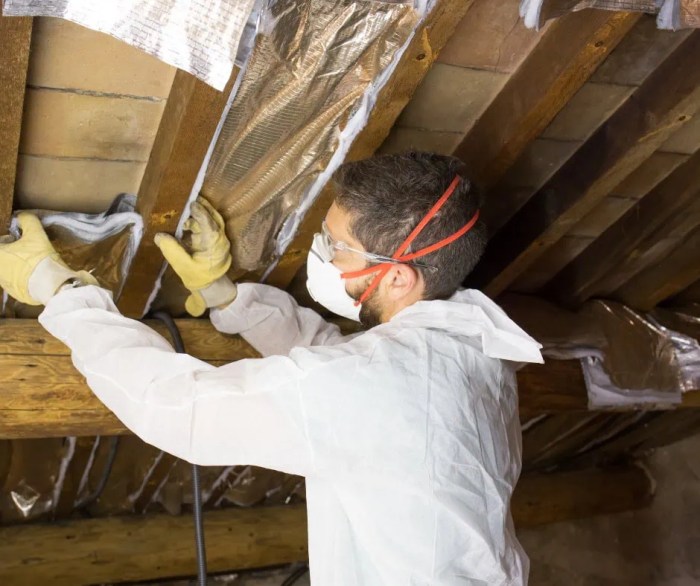
DIY vs. Professional Insulation Installation: How Much Is It To Install Insulation
Source: homedit.com
Choosing between a DIY insulation project and hiring a professional installer depends on several factors, including your budget, skill level, and the complexity of the job. While DIY can seem appealing for saving money, professional installation often offers better quality, efficiency, and peace of mind. Let’s weigh the pros and cons.
Cost Comparison: DIY vs. Professional
The initial cost of materials for a DIY insulation project will be significantly lower than the total cost of hiring a professional. However, DIY projects can unexpectedly increase in cost if you make mistakes, need to purchase additional materials, or damage existing structures. Professionals factor in labor, equipment rental (if applicable), disposal fees, and their expertise into their quotes, resulting in a higher upfront cost but potentially fewer unforeseen expenses. For example, a professional might charge $2,000 to insulate a 1,500 square foot attic, while the materials for a DIY job might only cost $500-$800, but additional costs could easily push this over the professional’s quote if mistakes are made.
Benefits and Risks of DIY Insulation Installation
DIY insulation offers the potential for substantial cost savings if the project is completed successfully. It also provides a sense of accomplishment and allows for greater control over the process. However, improper installation can lead to reduced energy efficiency, potential health hazards from incorrect handling of materials (like fiberglass), structural damage, and even voiding home warranties. Furthermore, some insulation types, such as spray foam, require specialized equipment and expertise best left to professionals.
DIY Attic Insulation: A Step-by-Step Guide
This guide focuses on batts or rolls of fiberglass insulation, a common and relatively easy-to-install option for attics. Always prioritize safety and wear appropriate personal protective equipment (PPE).
- Preparation: Clear the attic of any obstructions. Wear a dust mask, gloves, and eye protection.
- Measurement: Measure the attic floor area to determine the amount of insulation needed. Consult the insulation packaging for coverage information.
- Installation: Carefully unroll or place the insulation batts, ensuring they fit snugly between joists. Avoid compressing the insulation, as this reduces its effectiveness.
- Finishing: Ensure the insulation is evenly distributed and covers the entire area. For best results, aim for a consistent depth recommended for your climate.
Necessary Tools and Safety Equipment
For both DIY and professional installations, appropriate safety equipment is crucial. This includes dust masks (N95 recommended for fiberglass), gloves, eye protection, and potentially hearing protection for power tools. Tools needed for DIY might include a measuring tape, utility knife, and possibly a ladder. Professionals will likely use more specialized equipment, such as spray foam equipment or pneumatic staplers for installing rigid foam board insulation.
DIY vs. Professional: A Cost-Time-Skill Comparison
| Feature | DIY | Professional |
|---|---|---|
| Cost | Lower initial cost, potential for increased costs due to mistakes | Higher initial cost, but typically fewer unexpected expenses |
| Time Commitment | Significantly longer, depending on project size and experience | Faster completion time due to expertise and efficiency |
| Skill Level Required | Basic DIY skills; some insulation types require more expertise | High level of skill and experience; specialized knowledge and training |
Energy Savings and Return on Investment
Investing in insulation is a smart move that pays off in the long run, primarily through significant energy savings and a healthy return on your investment. Proper insulation acts as a barrier, preventing heat loss in winter and heat gain in summer, leading to a more comfortable home and lower energy bills. The extent of these savings depends on several factors, including the type and amount of insulation installed, your climate, and your home’s existing energy efficiency.
Adding insulation is essentially a preventative measure against energy waste. By reducing the amount of energy your home needs to maintain a comfortable temperature, you’ll see a direct impact on your monthly utility bills. This translates into significant cost savings over the lifetime of the insulation. The higher the R-value of the insulation (a measure of its thermal resistance), the greater the energy savings.
Return on Investment Examples
Let’s consider a hypothetical scenario: A homeowner in a cold climate spends $5,000 on attic insulation, increasing its R-value from R-13 to R-38. Before the upgrade, their annual heating bill was $1,800. After the upgrade, their heating bill drops to $1,000, representing a savings of $800 annually. This means the initial investment is recouped in approximately 6.25 years ($5,000 / $800 = 6.25). This is a simplified example, and actual ROI can vary based on numerous factors, but it illustrates the potential for a strong return. Another example might involve a homeowner in a hot climate who upgrades their wall insulation. The cost savings might be less pronounced in heating but will be more significant in cooling, resulting in similar or even better ROI depending on the climate and energy costs.
R-Value and Energy Efficiency
The R-value of insulation directly correlates to its effectiveness. A higher R-value indicates greater resistance to heat flow. This means less energy is required to heat or cool your home, resulting in lower utility bills. For instance, comparing R-13 to R-38 insulation, the R-38 insulation will significantly reduce energy loss, leading to much greater savings over time. The specific energy savings will depend on factors like climate, house size, and existing insulation levels, but the general principle remains: higher R-value equals greater savings.
Illustrative Example of Energy Bill Reduction, How much is it to install insulation
Consider a family in Minnesota with a 1,500 square foot home. Their average annual energy bill before insulation upgrade was $2,400. After installing R-38 insulation in their attic and R-15 in their exterior walls, their annual energy bill dropped to $1,600. This represents a $800 annual savings (a 33.3% reduction), a considerable return on their insulation investment. This scenario is entirely plausible, as many homeowners report similar levels of savings after insulation upgrades, particularly in areas with extreme temperatures.
Insulation R-Value and Energy Cost Savings
Imagine a graph with the horizontal axis representing the R-value of insulation (ranging from low to high) and the vertical axis representing the annual energy cost (ranging from high to low). The graph would show a clear downward trend: As the R-value increases, the annual energy cost decreases. The curve would be steeper initially, indicating that the greatest savings are achieved with the initial increases in R-value. As the R-value continues to increase, the rate of cost savings would gradually diminish, eventually flattening out as the insulation approaches its maximum effectiveness for the given climate and building structure. This visual representation demonstrates the diminishing returns of continually increasing insulation R-value, highlighting the point of optimal cost-effectiveness.
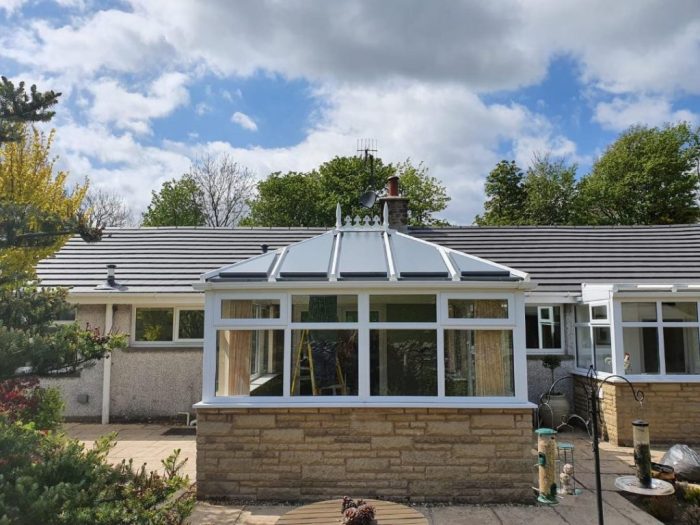
Last Point
Source: co.uk
Insulating your home is a significant investment, but one that can pay off handsomely in the long run through reduced energy bills and increased comfort. By understanding the factors influencing cost—from material selection and labor to potential hidden expenses—you can make informed choices that best suit your needs and budget. Remember to get multiple quotes, thoroughly vet potential installers, and carefully weigh the pros and cons of DIY versus professional installation. With a little planning and research, you can transform your home into a cozy, energy-efficient haven without breaking the bank.