Roofing and Insulation Contractors Near Me
Roofing and insulation contractors near me: Finding the right professionals for your home improvement project can feel overwhelming. This guide simplifies the process, walking you through everything from finding reputable contractors to understanding project costs and managing the entire experience. We’ll cover essential services, qualifications to look for, and communication strategies to ensure a smooth and successful renovation.
From initial searches and comparing contractor profiles to understanding pricing for different roofing materials and insulation types, we’ll equip you with the knowledge to make informed decisions. We’ll also explore project management, addressing potential issues and maintaining open communication with your chosen contractor. Let’s dive in and find the perfect team for your home!
Local Contractor Search Experience
Source: ottawainsulations.ca
Finding the right roofing and insulation contractor shouldn’t be a headache. A well-designed website can make all the difference in simplifying the process and ensuring homeowners find reliable professionals quickly and easily. This section details how to create a superior user experience for finding local roofing and insulation contractors online.
Website Search Bar Design
A simple, intuitive search bar is crucial. The ideal design prioritizes clarity and speed. Imagine a search bar prominently placed at the top of the homepage, perhaps with a location auto-fill feature. The text within the search bar could read something like “Find Local Roofing & Insulation Contractors.” Below the search bar, a small, clear explanation could be added: “Enter your zip code or city and state to find contractors near you.” The search button should be clearly labeled and visually distinct. Avoid overly complex designs or unnecessary fields; the focus should be on quick and efficient searches.
Ideal User Experience: Search to Selection
The ideal user experience flows seamlessly from initial search to final contractor selection. Here’s a step-by-step guide:
- Search Initiation: The user enters their location (zip code or city, state) into the search bar and clicks “Search.”
- Results Page: A list of relevant contractors appears, sorted by proximity or rating (clearly indicated). Each listing should include a company logo, name, brief description, and star rating.
- Contractor Profile: Clicking on a contractor’s listing takes the user to a detailed profile page. This page should include comprehensive information, such as service areas, years in business, licensing and insurance details, and a gallery of completed projects.
- Review and Contact: The profile prominently displays customer reviews and ratings, fostering trust and transparency. Clear contact information (phone number, email address, website) is readily available.
- Contractor Selection: Based on the information provided, the user can select the contractor that best suits their needs and contact them directly.
Website Layouts: Mobile and Desktop
Effective website design adapts to different screen sizes.
Example 1 (Desktop): A three-column layout. The left column could feature a map showing contractor locations, the center column displays contractor listings (similar to a Google search results page), and the right column could feature filters (e.g., service type, price range).
Example 2 (Mobile): A single-column layout is ideal for mobile. Contractor listings are displayed sequentially, with a prominent “View Map” button to show contractor locations. The contractor profile would be accessed by tapping on the listing.
Example 3 (Tablet): A two-column layout could work well on tablets. One column could display a map and filters, while the other column shows the contractor listings. This provides a balance between detailed information and ease of navigation.
Importance of Clear Contractor Profiles
Clear and comprehensive contractor profiles are essential for building trust and facilitating informed decision-making. Each profile should include:
- Company Name and Logo: Instantly recognizable branding.
- Contact Information: Phone number, email address, website, physical address (if applicable).
- Service Area: Clearly defined geographic area served.
- Years in Business: Demonstrates experience and stability.
- Licensing and Insurance: Assures legitimacy and liability coverage.
- Project Gallery: High-quality photos showcasing previous work.
- Customer Reviews and Ratings: Social proof and testimonials.
- Specializations: Highlights expertise in specific roofing or insulation areas.
Contractor Service Offerings
Choosing the right roofing and insulation contractor is crucial for protecting your home and saving on energy costs. Understanding the services offered and how they’re priced is key to making an informed decision. This section details typical services and provides information on pricing and cost estimation.
Roofing and Insulation Services
The table below lists the common services offered by roofing and insulation contractors. Remember, specific offerings may vary between companies.
| Roofing Services | Insulation Services | Other Services | Maintenance Services |
|---|---|---|---|
| Roof Inspections & Repairs | Attic Insulation Installation | Soffit & Fascia Repair/Replacement | Annual Roof Inspections |
| Roof Replacements (Asphalt, Metal, Tile, etc.) | Wall Insulation Installation | Gutter Cleaning & Repair | Emergency Roof Repairs |
| Roof Leak Detection & Repair | Spray Foam Insulation | Chimney Repair | Ventilation System Checks |
| Skylight Installation & Repair | Insulation Removal & Replacement | Flashing Repair | Moisture Detection and Remediation |
Roofing Material Pricing
Pricing for roofing materials varies significantly based on material type, durability, and aesthetic appeal. Here’s a comparison:
Asphalt shingles are the most common and generally the most affordable option, typically ranging from $3 to $8 per square foot installed. They offer decent lifespan (15-30 years) but are less durable than other choices.
Metal roofing is more expensive, ranging from $8 to $20+ per square foot installed, offering superior longevity (50+ years) and weather resistance. However, the upfront cost is significantly higher.
Tile roofing, including clay and concrete tiles, is a premium option, costing $10 to $30+ per square foot installed. They offer exceptional durability and longevity (50+ years or more) but require specialized installation. These prices are estimates and can vary based on location, labor costs, and specific product choices.
Insulation Types and R-Values
Understanding insulation R-values is crucial for energy efficiency. R-value represents the material’s resistance to heat flow. Higher R-values mean better insulation.
The following are examples of common insulation types and their typical R-values (per inch):
- Fiberglass Batt: R-3 to R-6
- Spray Foam: R-6 to R-7 per inch (can vary based on type)
- Cellulose: R-3.1 to R-3.8 per inch
- Rigid Foam Boards (Polyisocyanurate): R-5.6 to R-8 per inch
Cost Estimation for Roofing and Insulation Projects
Estimating project costs requires considering square footage and material costs. Here’s a simplified example:
Let’s say you have a 2000 square foot roof and choose asphalt shingles at $5 per square foot installed. The roofing cost would be approximately 2000 sq ft * $5/sq ft = $10,000. This is a rough estimate; actual costs may vary based on factors like roof complexity, labor rates, and material availability.
For insulation, let’s assume you need 1000 square feet of attic insulation with an R-value of 30. If you choose fiberglass batts at $1 per square foot installed, the approximate cost would be 1000 sq ft * $1/sq ft = $1000. Again, this is a simplified estimate. The actual cost depends on the insulation type, R-value requirements, and the complexity of installation.
Remember to always obtain multiple quotes from reputable contractors to compare pricing and services before making a decision.
Contractor Qualification and Licensing
Source: affordableinsulationmn.com
Choosing a roofing and insulation contractor involves more than just comparing prices. Ensuring your chosen contractor is qualified and properly licensed protects you from potential problems down the line, including shoddy workmanship, safety hazards, and legal disputes. This section details the essential qualifications and licensing you should look for.
Reputable roofing and insulation contractors possess a combination of experience, certifications, and licenses that demonstrate their competence and commitment to professional standards. These credentials assure that the work will be done correctly, safely, and legally.
Key Qualifications and Licenses
A reputable contractor should hold relevant licenses and certifications specific to their region. These vary by location, so checking with your local licensing board is crucial. Generally, this includes a business license, possibly a contractor’s license, and potentially specialized certifications for roofing and insulation installation. Proof of insurance, including general liability and workers’ compensation, is also non-negotiable. Years of experience in the field are also a significant indicator of skill and reliability.
Contractor Credential Checklist
Before hiring any contractor, use this checklist to evaluate their credentials:
Thoroughly reviewing a contractor’s qualifications is a crucial step in protecting your investment and ensuring a successful project. Don’t hesitate to ask for clarification or further documentation if something is unclear.
- Verify their business license with your local authorities.
- Confirm their contractor’s license (if required in your area).
- Check for relevant certifications, such as those from the National Roofing Contractors Association (NRCA) or similar organizations.
- Request proof of general liability insurance and workers’ compensation insurance. These policies protect you from financial losses in case of accidents or damages on your property.
- Review online reviews and testimonials from previous clients.
- Request references and contact them to inquire about their experiences.
- Ask about their experience and the number of similar projects they’ve completed.
Importance of Insurance and Workers’ Compensation
Insurance is paramount. General liability insurance protects you from financial responsibility if a contractor’s employee causes damage to your property or injures someone during the project. Workers’ compensation insurance covers medical expenses and lost wages for employees injured on the job, preventing you from being held liable for these costs. A contractor without adequate insurance exposes you to significant financial risk.
Sample Contract Essential Clauses
A well-written contract protects both the homeowner and the contractor. Here are essential clauses to include:
A detailed contract minimizes misunderstandings and disputes. Having a lawyer review the contract before signing is always recommended, especially for large projects.
- Project Scope: A clear description of the work to be performed, including materials and specifications.
- Payment Schedule: A detailed payment plan with milestones tied to completed work stages.
- Start and Completion Dates: Realistic timelines with potential allowances for unforeseen delays.
- Warranty Information: Specific details about the warranty on materials and workmanship.
- Dispute Resolution: A clear process for resolving any disagreements that may arise.
- Insurance Verification: A clause requiring the contractor to provide proof of current and valid insurance.
- Permits and Inspections: Clarification on who is responsible for obtaining necessary permits and scheduling inspections.
Project Management and Communication
Effective project management and clear communication are crucial for a successful roofing or insulation project. These elements directly impact client satisfaction, project timelines, and the overall quality of the work. A well-defined plan ensures a smooth process from initial contact to final walkthrough.
Project management involves a structured approach to organizing and executing the project efficiently. Communication, on the other hand, focuses on maintaining consistent and transparent interaction with the client, keeping them informed and involved every step of the way.
Project Management Steps
A typical roofing or insulation project follows a structured sequence of steps. Adhering to this plan minimizes confusion and ensures all tasks are completed efficiently.
- Initial Consultation and Assessment: This involves a site visit to assess the project needs, discuss the client’s requirements, and provide a detailed estimate. Photographs are taken to document the existing conditions.
- Proposal and Contract: A formal proposal outlining the scope of work, materials, timeline, and payment schedule is presented to the client. Once the client approves, a legally binding contract is signed.
- Material Procurement: Necessary materials are ordered and delivered to the site. Verification of the correct quantities and quality of materials is done before proceeding.
- Project Execution: This is the main phase where the actual roofing or insulation work takes place. Regular quality checks are performed to ensure adherence to standards and specifications.
- Final Inspection and Cleanup: A thorough inspection is conducted to ensure the completed work meets the agreed-upon standards. The worksite is cleaned up, leaving the area tidy and free of debris.
- Final Payment and Documentation: The final payment is received, and all relevant documentation, including warranties and receipts, is provided to the client.
Communication Plan
Maintaining open and consistent communication throughout the project lifecycle is essential for client satisfaction. This involves proactively updating the client on progress, addressing concerns promptly, and maintaining professional courtesy.
- Initial Contact: Prompt response to inquiries, scheduling a timely site visit, and providing a clear and concise estimate.
- Regular Updates: Providing scheduled updates on the project’s progress, including photos or videos if possible, and addressing any questions or concerns promptly via phone or email.
- Unexpected Delays: Immediately notifying the client of any unforeseen delays, explaining the reasons for the delay, and providing a revised timeline.
- Problem Resolution: Addressing any issues or complaints efficiently and professionally, finding solutions that meet the client’s needs and expectations.
- Final Walkthrough: Conducting a thorough walkthrough with the client upon project completion, addressing any remaining questions or concerns, and obtaining their final approval.
Handling Unexpected Issues and Delays
Unforeseen circumstances can arise during any project. A proactive approach to problem-solving and transparent communication is crucial in managing these situations. For example, unexpected weather delays should be communicated immediately, along with a revised timeline. If unforeseen structural issues are discovered, the contractor should explain the situation to the client, provide options for remediation, and obtain their approval before proceeding. This may involve securing additional permits or adjusting the project scope. Open communication helps maintain trust and prevents misunderstandings.
Importance of Clear and Consistent Communication
Clear and consistent communication fosters trust and ensures client satisfaction. Prompt responses to inquiries, proactive updates on project progress, and transparent communication about potential challenges build confidence and strengthen the client-contractor relationship. A satisfied client is more likely to recommend your services and provide positive reviews. Conversely, poor communication can lead to misunderstandings, disputes, and negative reviews, potentially damaging your reputation.
Visual Aids and Examples: Roofing And Insulation Contractors Near Me
Source: affordableinsulationmn.com
Seeing is believing, and when it comes to roofing and insulation, understanding the process and the results is crucial. This section provides visual aids and examples to illustrate the work involved in a typical project, from start to finish. We’ll cover installation processes, different roofing styles, and the transformative impact of our services.
Roofing Installation Process
A successful roofing project involves careful planning and execution. Understanding the stages ensures you know what to expect.
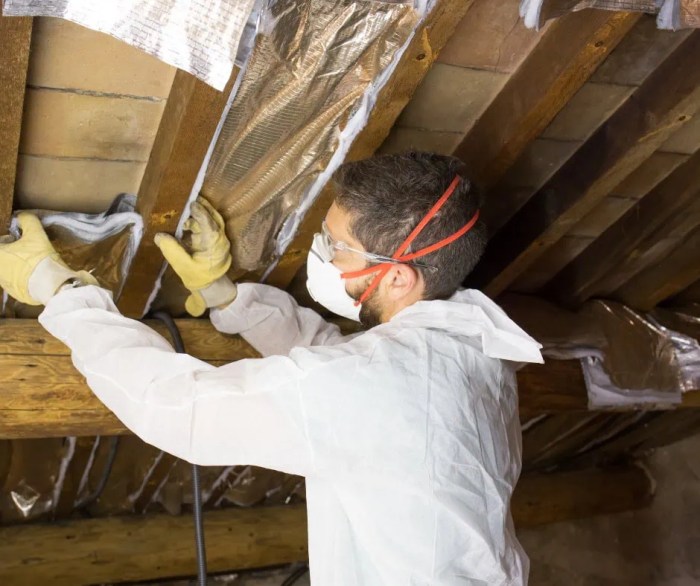
- Preparation: This includes a thorough inspection of the existing roof, removal of old materials (shingles, underlayment, etc.), and any necessary repairs to the underlying structure. This stage often involves careful attention to safety, using proper fall protection and equipment.
- Material Selection: Choosing the right roofing materials is vital. Factors to consider include budget, climate, aesthetic preferences, and the building’s style. Options range from asphalt shingles (common and cost-effective) to more durable materials like tile, metal, or slate. We’ll help you select the best option for your needs.
- Installation: This is the core of the project, involving the careful placement and securing of the chosen roofing material. This process requires precision and adherence to building codes to ensure a long-lasting, leak-proof roof. Proper ventilation is also critical during this phase.
- Cleanup: A professional contractor will leave your property clean and organized after the installation. This includes removing debris, disposing of waste responsibly, and ensuring the surrounding area is safe and tidy.
Insulation Installation Methods
Proper insulation significantly impacts energy efficiency and comfort. Different methods are used depending on the area being insulated.
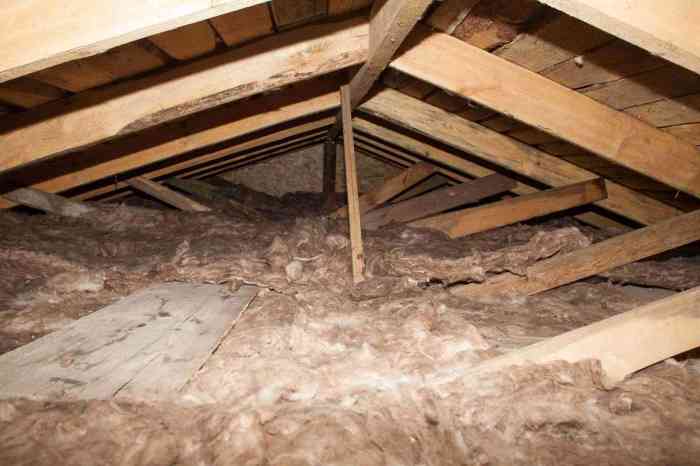
- Attics: Loose-fill insulation (blown-in cellulose or fiberglass) is commonly used in attics, filling gaps and crevices effectively. Batt insulation (fiberglass or mineral wool) is another option, offering good thermal performance. Proper ventilation is crucial in attics to prevent moisture buildup.
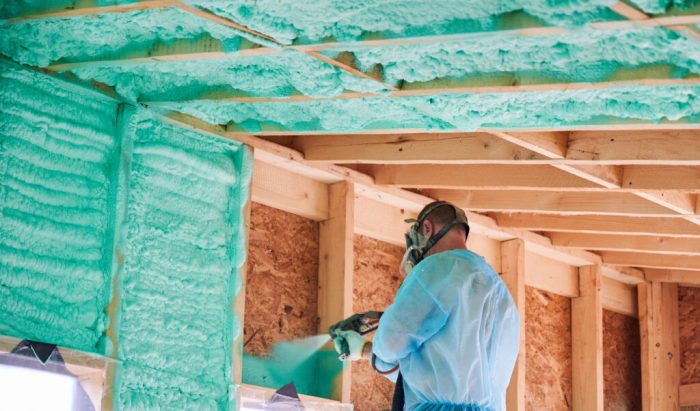
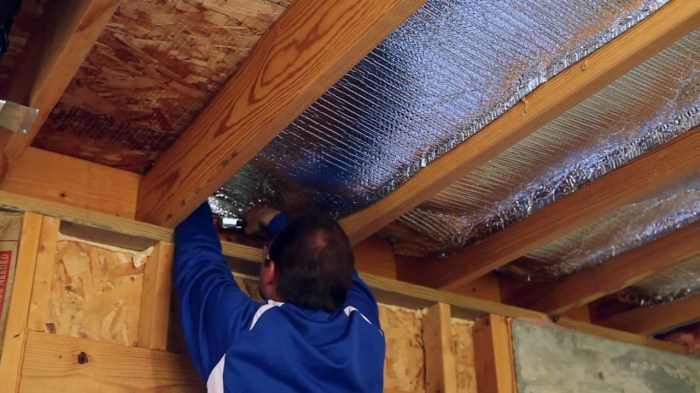
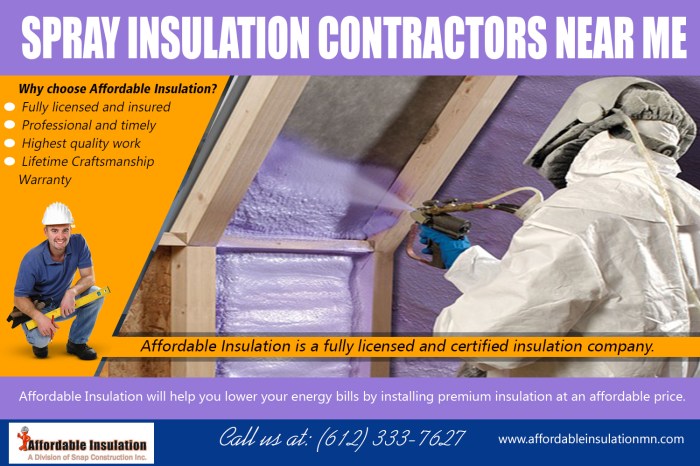
- Walls: Insulation in walls can be installed during new construction (cavity insulation) or retrofitted in existing structures. Options include spray foam insulation (offering excellent air sealing), batt insulation (installed in wall cavities), and rigid foam boards (used for exterior or interior wall applications).
- Crawl Spaces: Crawl spaces often benefit from vapor barriers to prevent moisture from entering the living space. Insulation can be installed using rigid foam boards, loose-fill insulation, or batt insulation, depending on the crawl space’s height and accessibility.
Roofing Styles, Roofing and insulation contractors near me
Roofing style significantly affects a home’s aesthetic appeal and its ability to withstand various weather conditions.
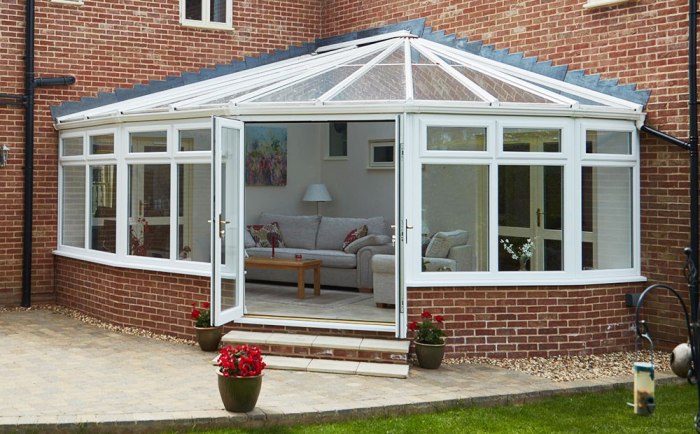
- Gable Roof: Characterized by two sloping sides that meet at a ridge, gable roofs are common and relatively simple to construct. They are suitable for many climates but may be less effective in areas with heavy snowfall.
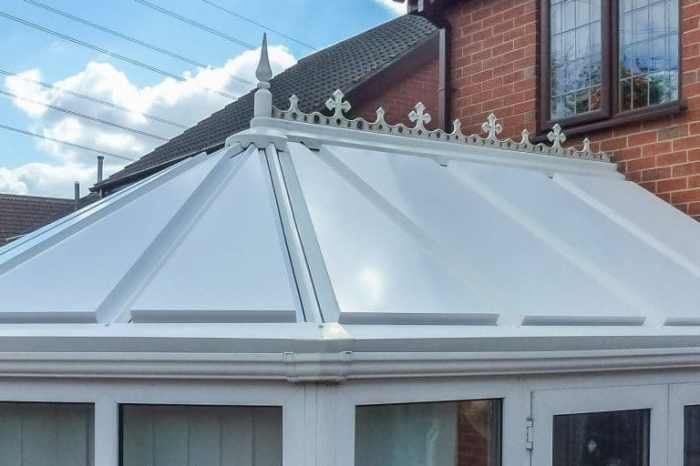
- Hip Roof: Features slopes on all four sides, creating a pyramid-like shape. Hip roofs are known for their durability and resistance to high winds, making them suitable for areas prone to severe weather. They are often more expensive to construct than gable roofs.
- Flat Roof: As the name suggests, flat roofs have a minimal slope. While they are aesthetically modern, they require proper drainage and waterproofing to prevent leaks. Flat roofs are more common in warmer climates and may not be suitable for areas with heavy snowfall.
Before-and-After Scenarios
The transformation achieved through professional roofing and insulation is often dramatic.
- Scenario 1: Imagine a home with an aging, leaky roof and poor attic insulation. The before picture shows damaged shingles, water stains on the ceilings, and high energy bills. The after picture reveals a completely new roof, with energy-efficient insulation installed, resulting in a visually appealing exterior and significant cost savings on energy bills.
- Scenario 2: A house with inadequate wall insulation might experience uncomfortable temperature fluctuations and drafts. The before picture shows visible cracks in the walls and uneven temperatures throughout the house. The after picture showcases the installation of spray foam insulation, resulting in a more energy-efficient and comfortable living space with consistent temperatures.
- Scenario 3: A commercial building with a flat roof experiencing leaks and water damage. The before picture displays significant damage to the roof and interior of the building. The after picture shows a completely repaired and waterproofed flat roof, preventing further damage and improving the overall structural integrity of the building.
Closing Notes
Renovating your home’s roof and insulation is a significant investment, but with careful planning and the right contractor, it can significantly improve your home’s comfort, energy efficiency, and value. Remember to prioritize clear communication, thorough vetting of contractors, and a well-defined contract to ensure a positive experience. By following the steps outlined in this guide, you’ll be well-prepared to navigate the process confidently and achieve your home improvement goals.